
Pop ads is a great traffic source thanks to the wide range of targeting options. You can be sure that visitors of your website will see only suitable offers. Let’s take a closer look at this type of ad.
Ad Placement Creation
Before creating an ad placement, you need to register as a webmaster. You can register on Affilight’s landing page by yourself or our manager can register you by request.
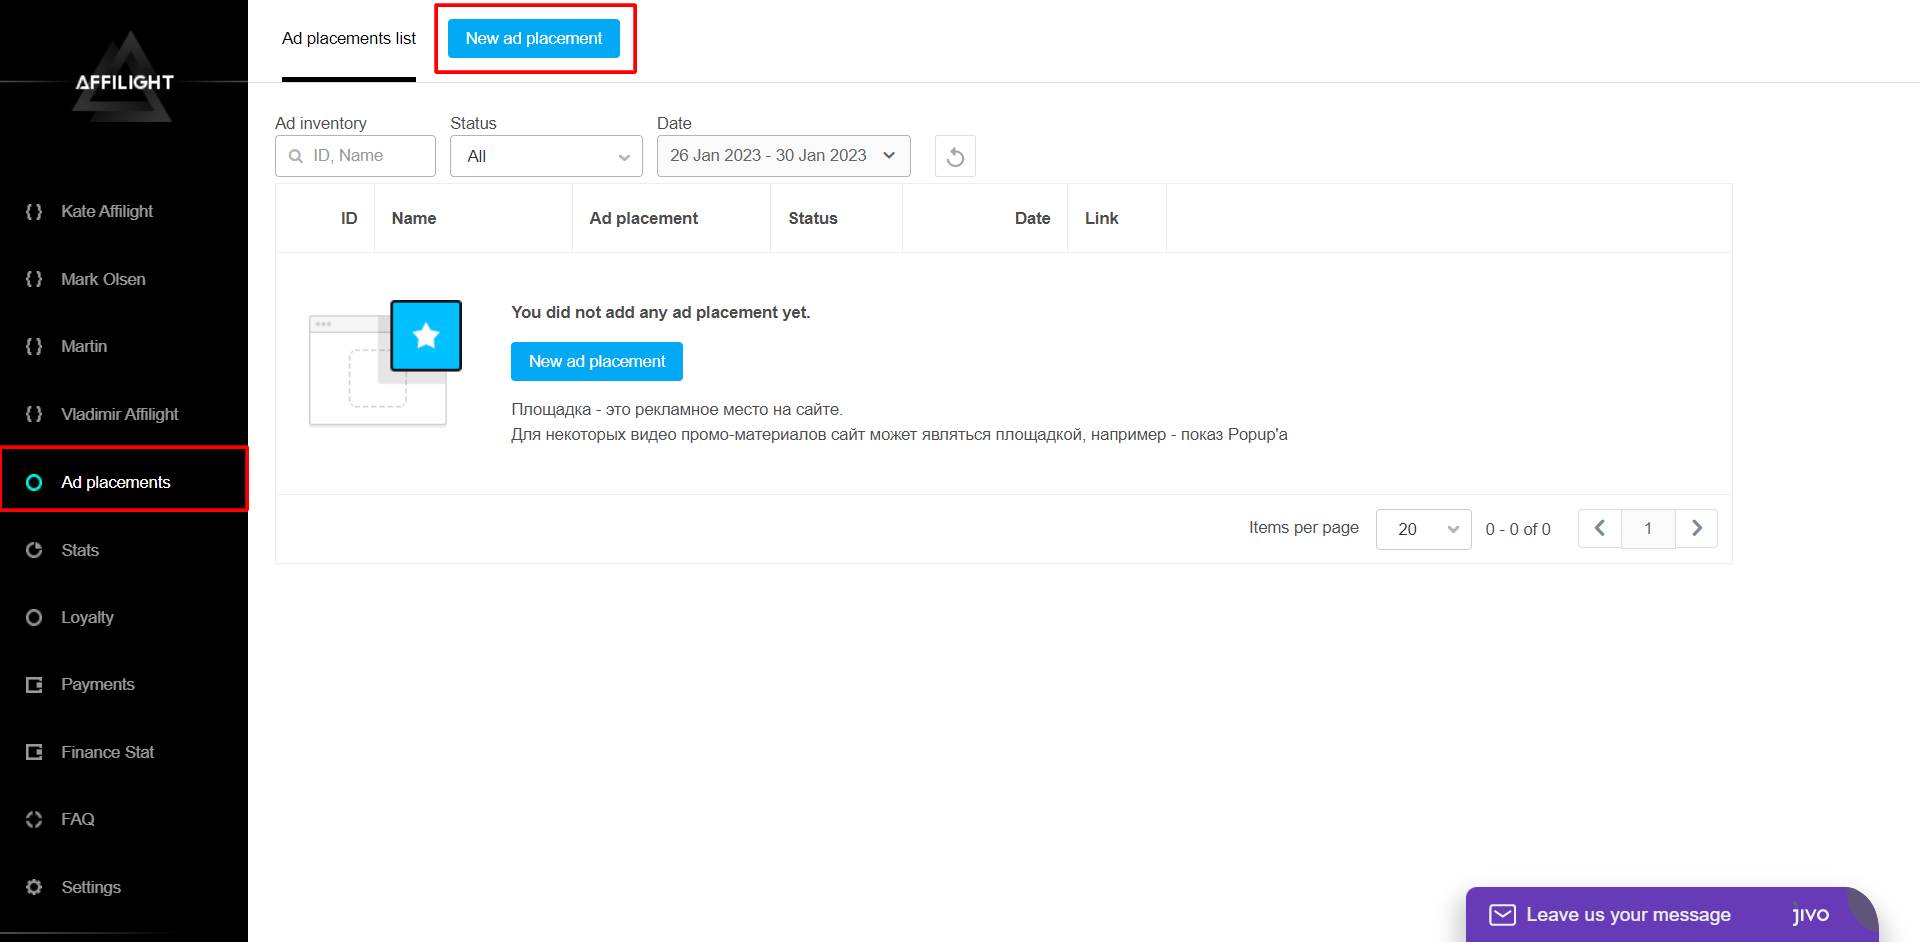
To create an ad placement, click the button New Ad Placement.
Settings of ad placement
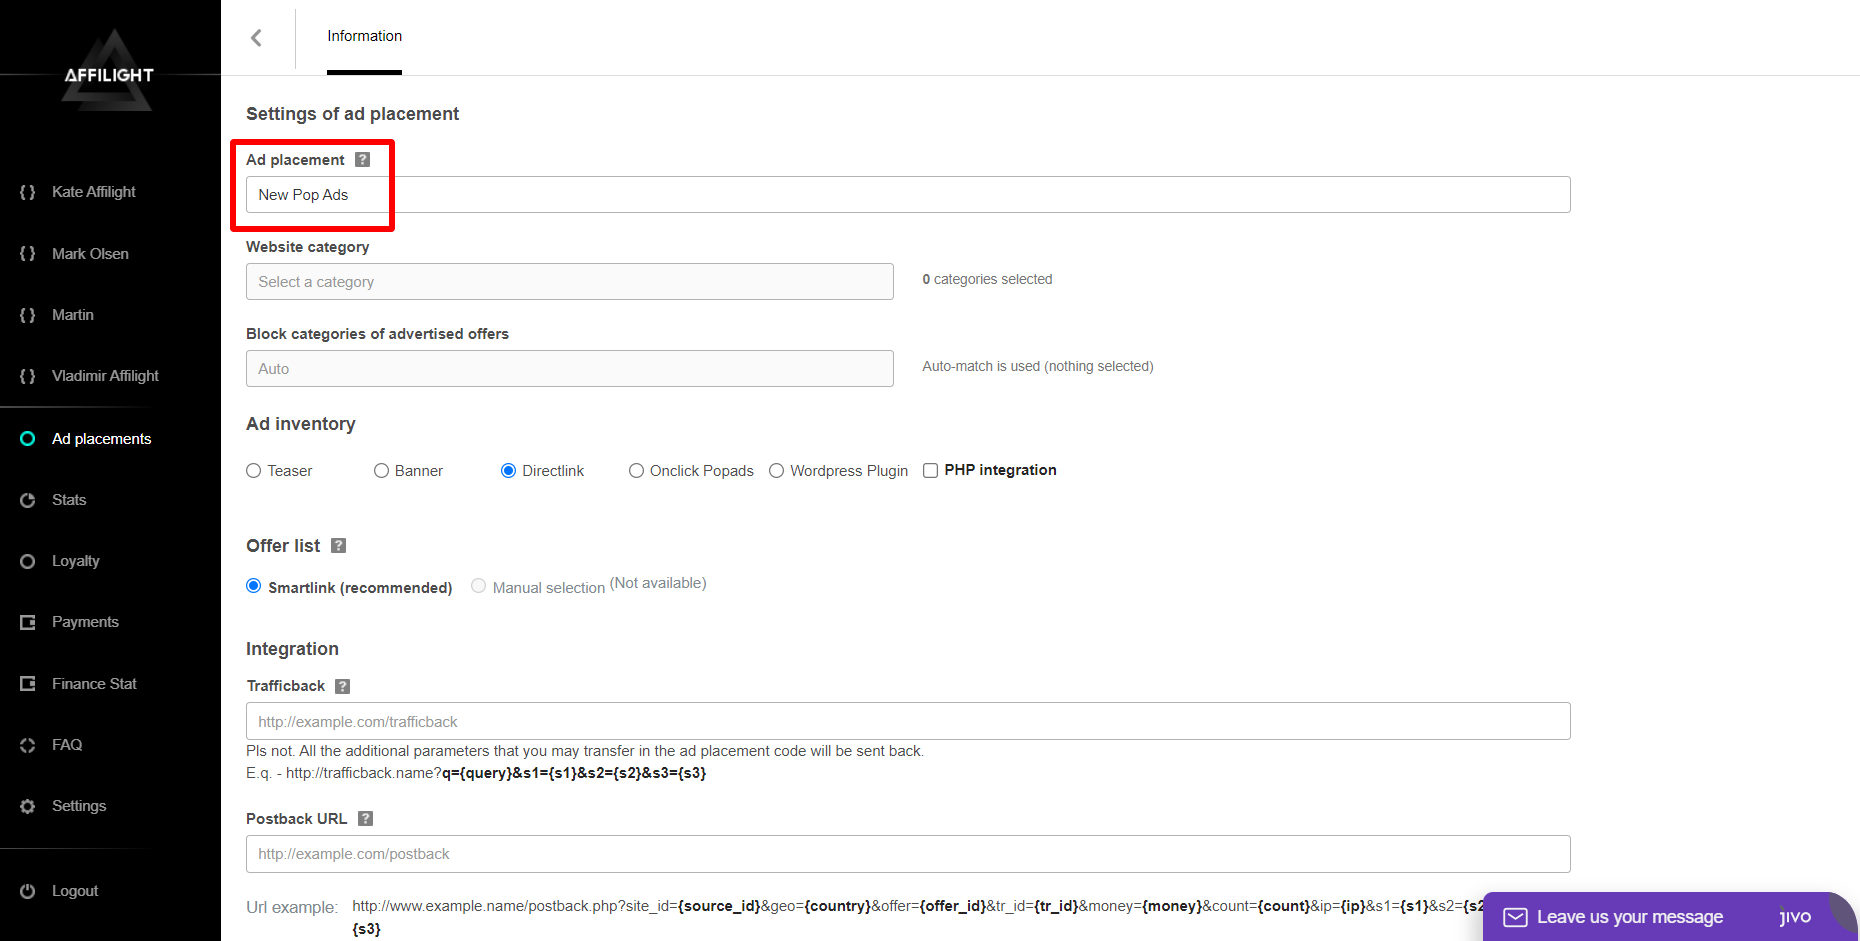
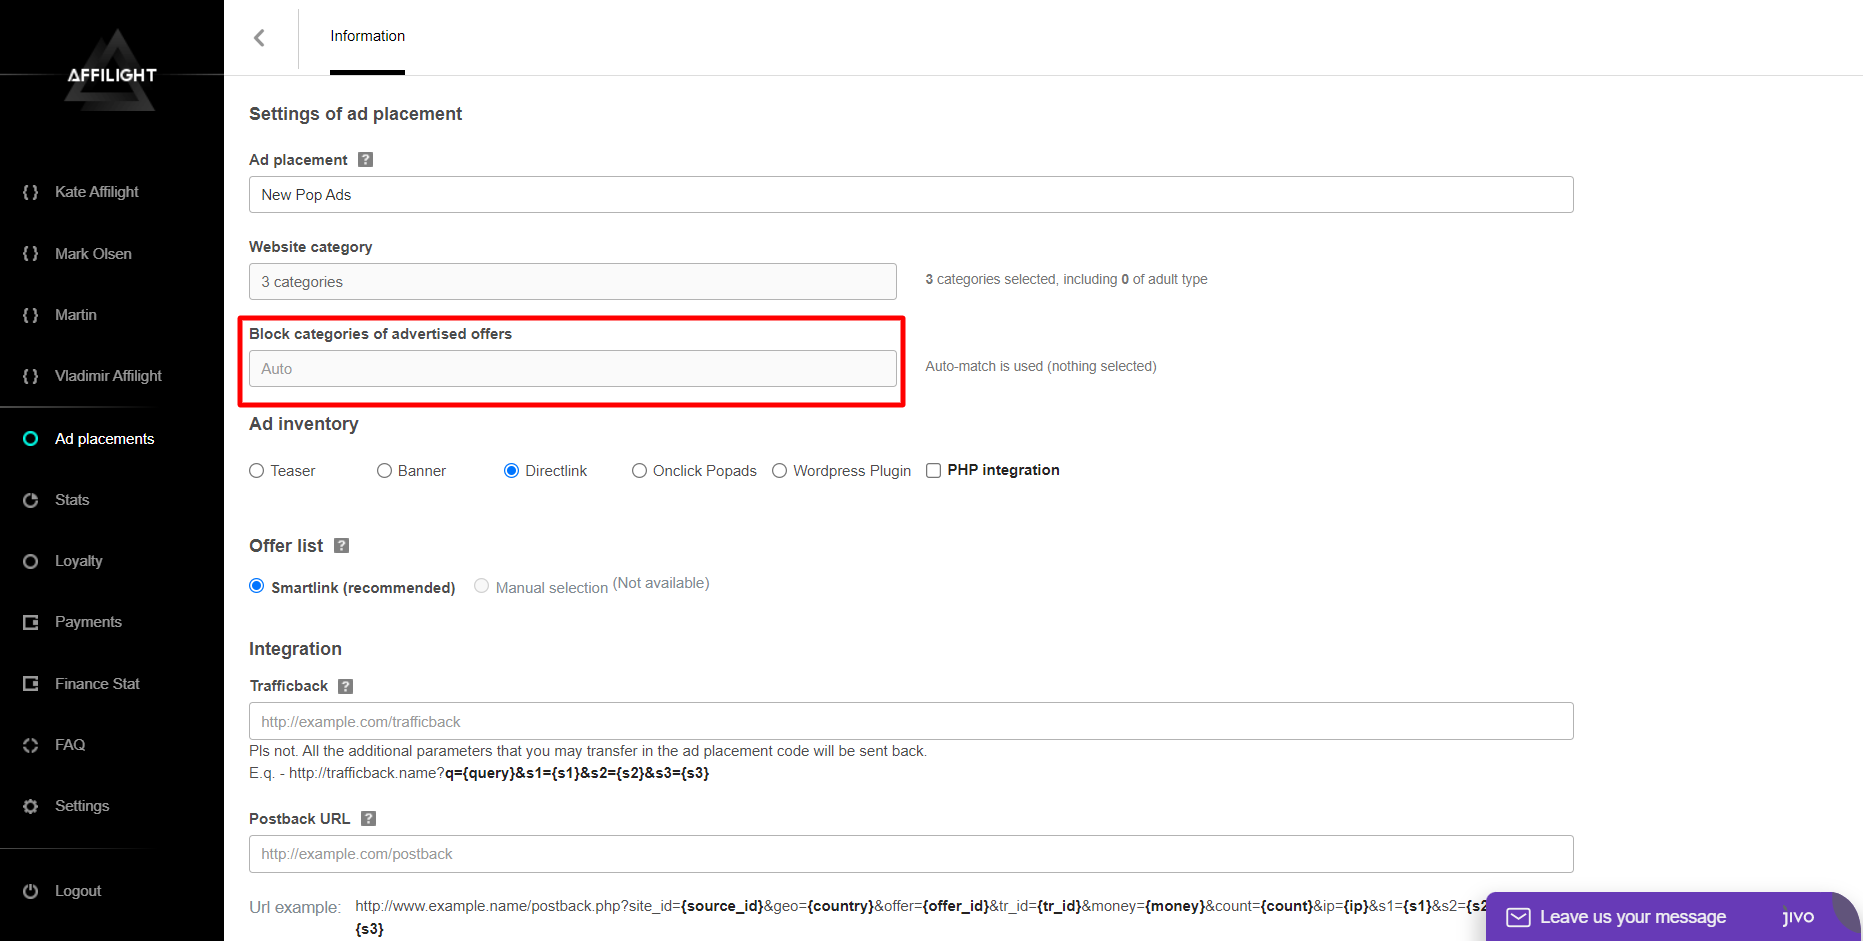
Give a name to the ad placement. For example, we will name our ad New Pop Ads.
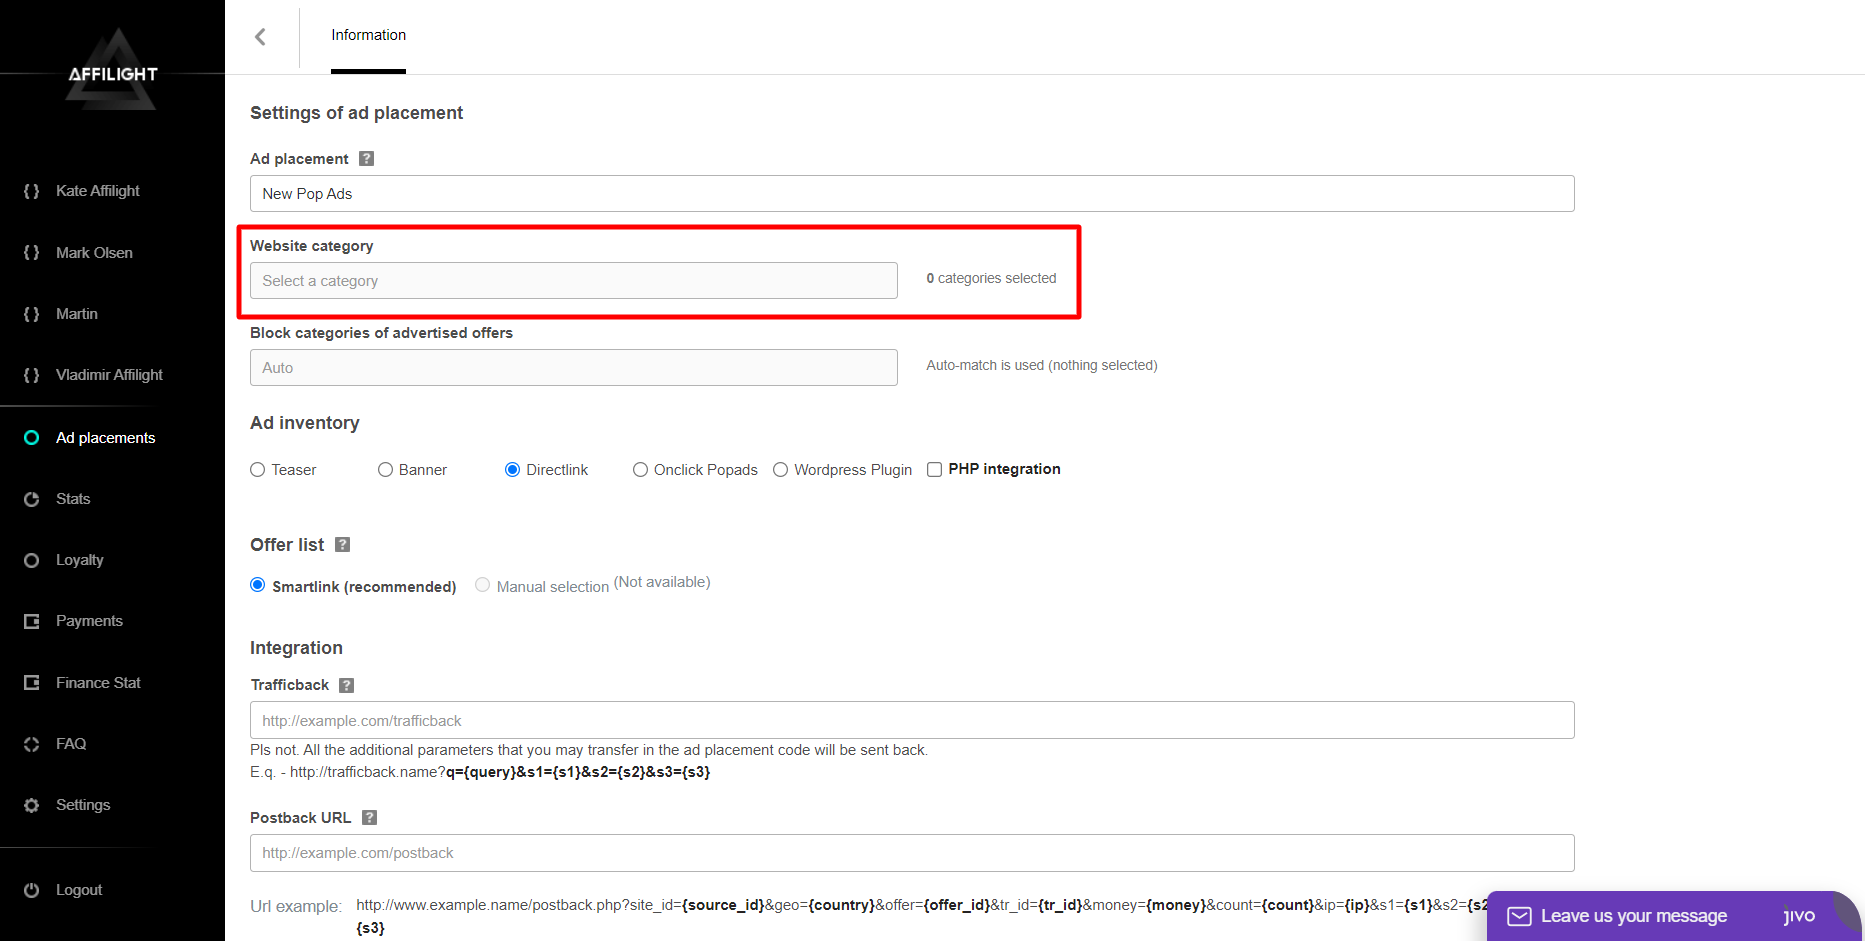
IAB categories is a required setting. You must specify one or more categories to which the platform belongs, as the IAB category is essential for precise targeting.
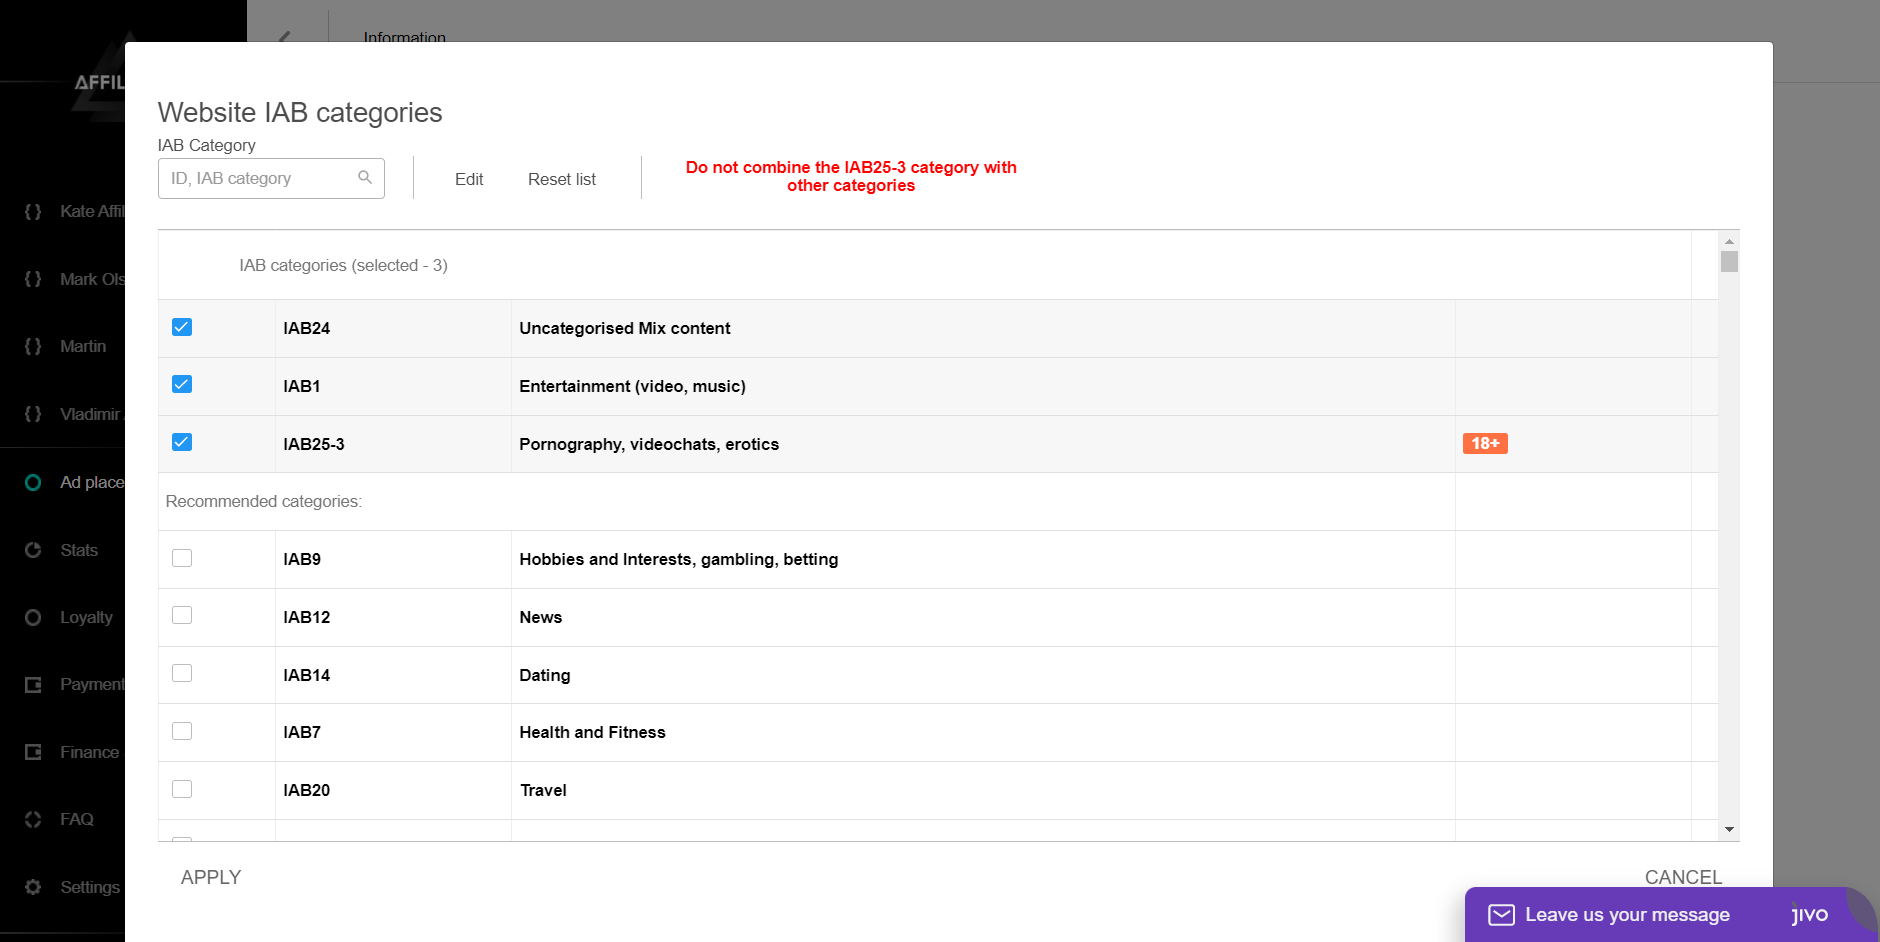
If you are having trouble choosing a category, consider selecting “IAB24 – Uncategorized Mix Content” or “IAB1 – Entertainment (video, music)” as they are broadly defined. If the platform contains sexually explicit content, choose “IAB25-3 – Pornography, videochats, erotica”. Note that only ads for adults will be shown on the platform in this case.
Note: It is recommended to set no more than 10 categories.
If you have selected “IAB25-3 – Pornography, videochats, erotica” do not select any other categories.
You can also block categories of advertised offers in a similar way to how you set the website IAB categories.
Ad inventory
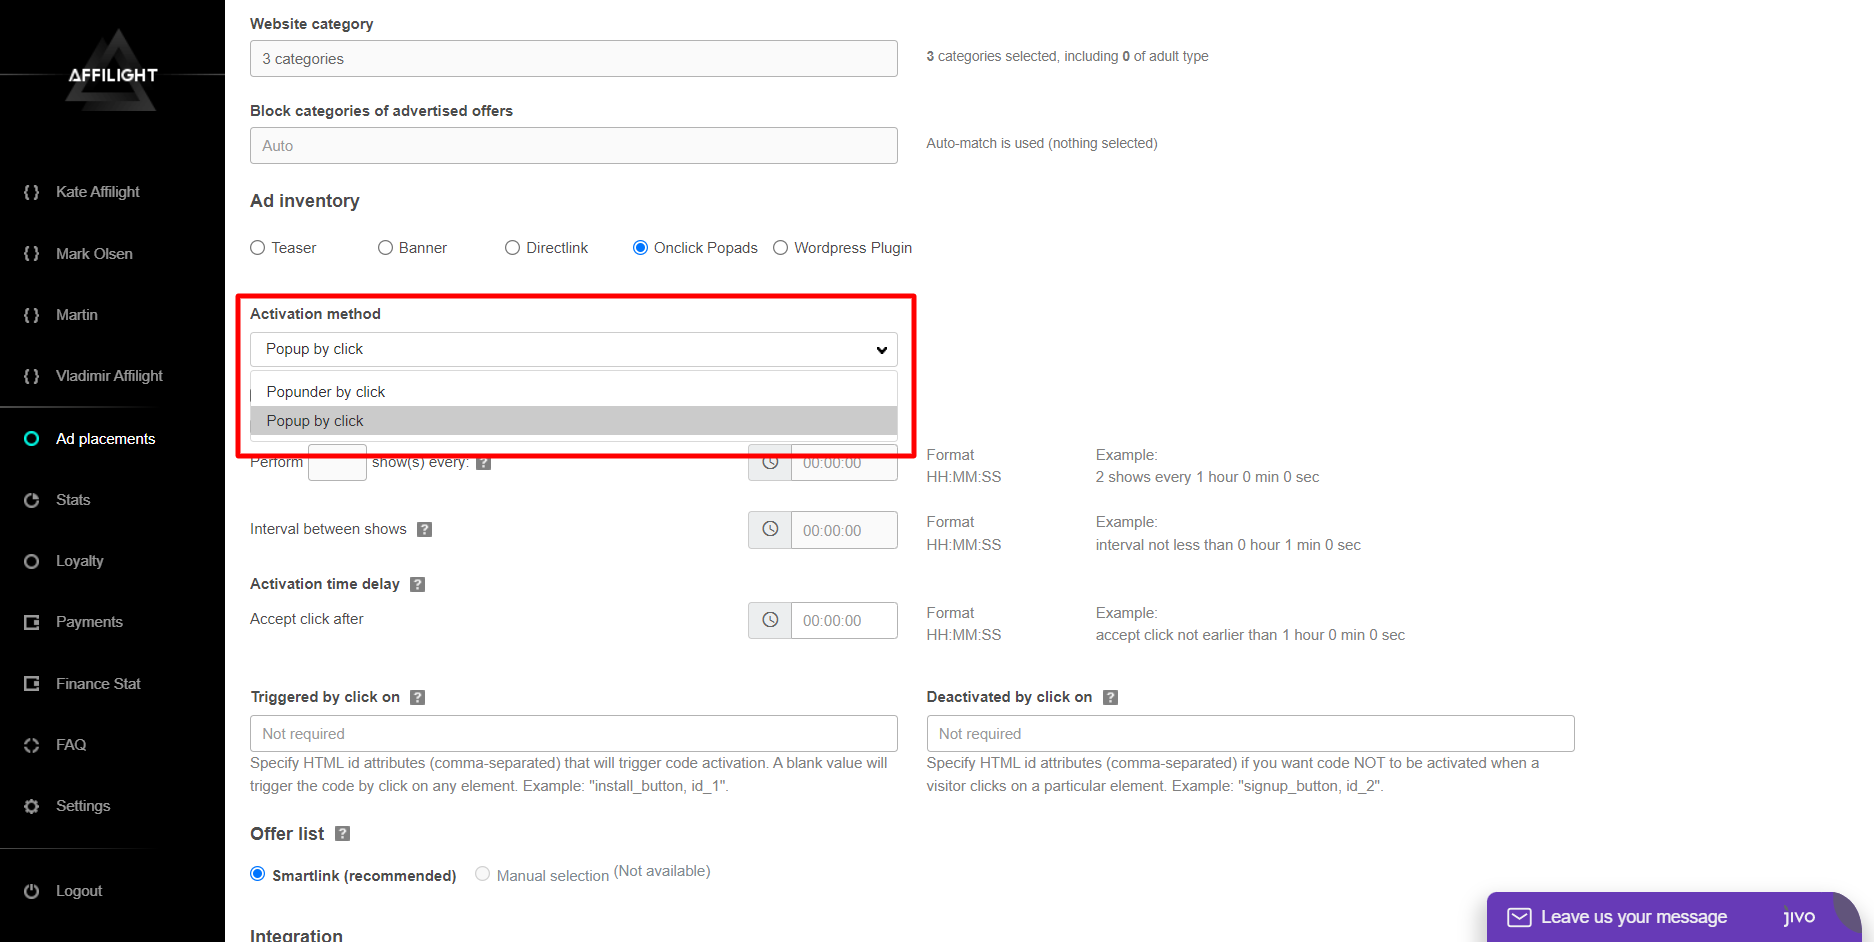
Select Onclick Popads.

There are two activation methods: Popup by click and Popunder by click. In the first case, an ad opens in a new Tab. In the second one, an ad opens under the current windows which remains active. We choose Popup by click.
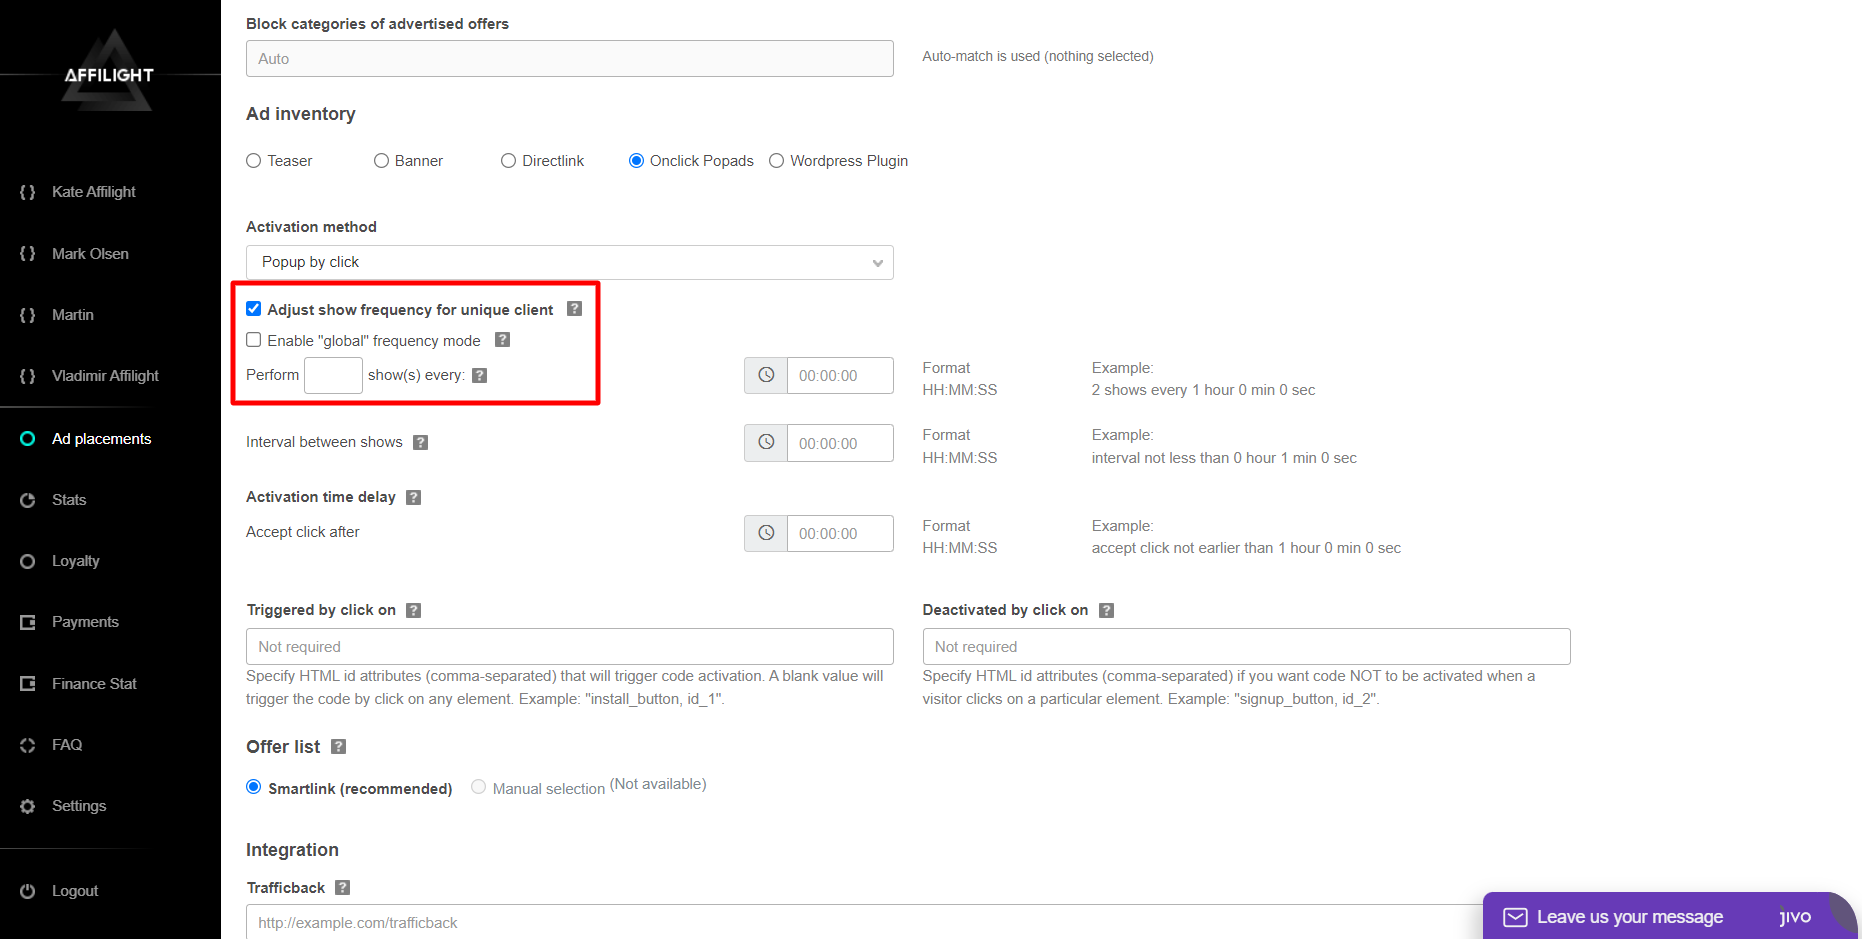
If you want to change frequency, tick the box Adjust show frequency for a unique client.
Optionally, set the number of impressions and time limit to perform them.
You can also enable “global” frequency mode. The show frequency will work on all pages (globally across domains).
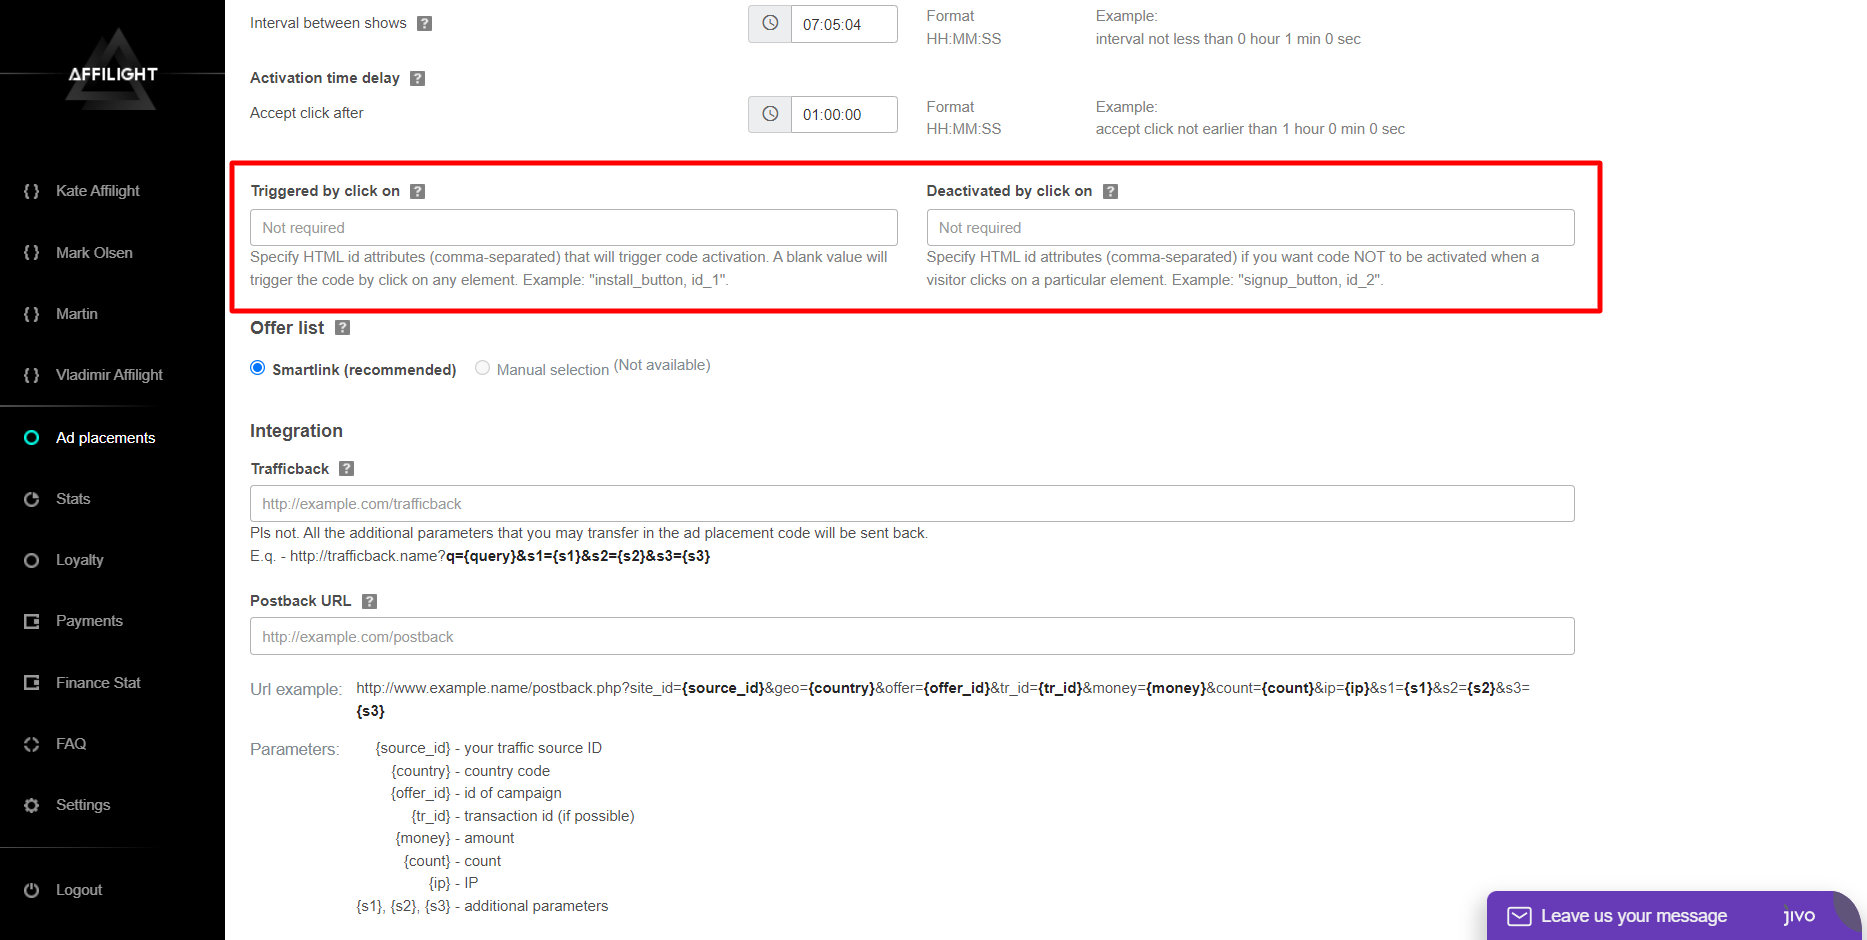
If you want your users to see a certain number of ads within a particular time then specify an interval between shows.
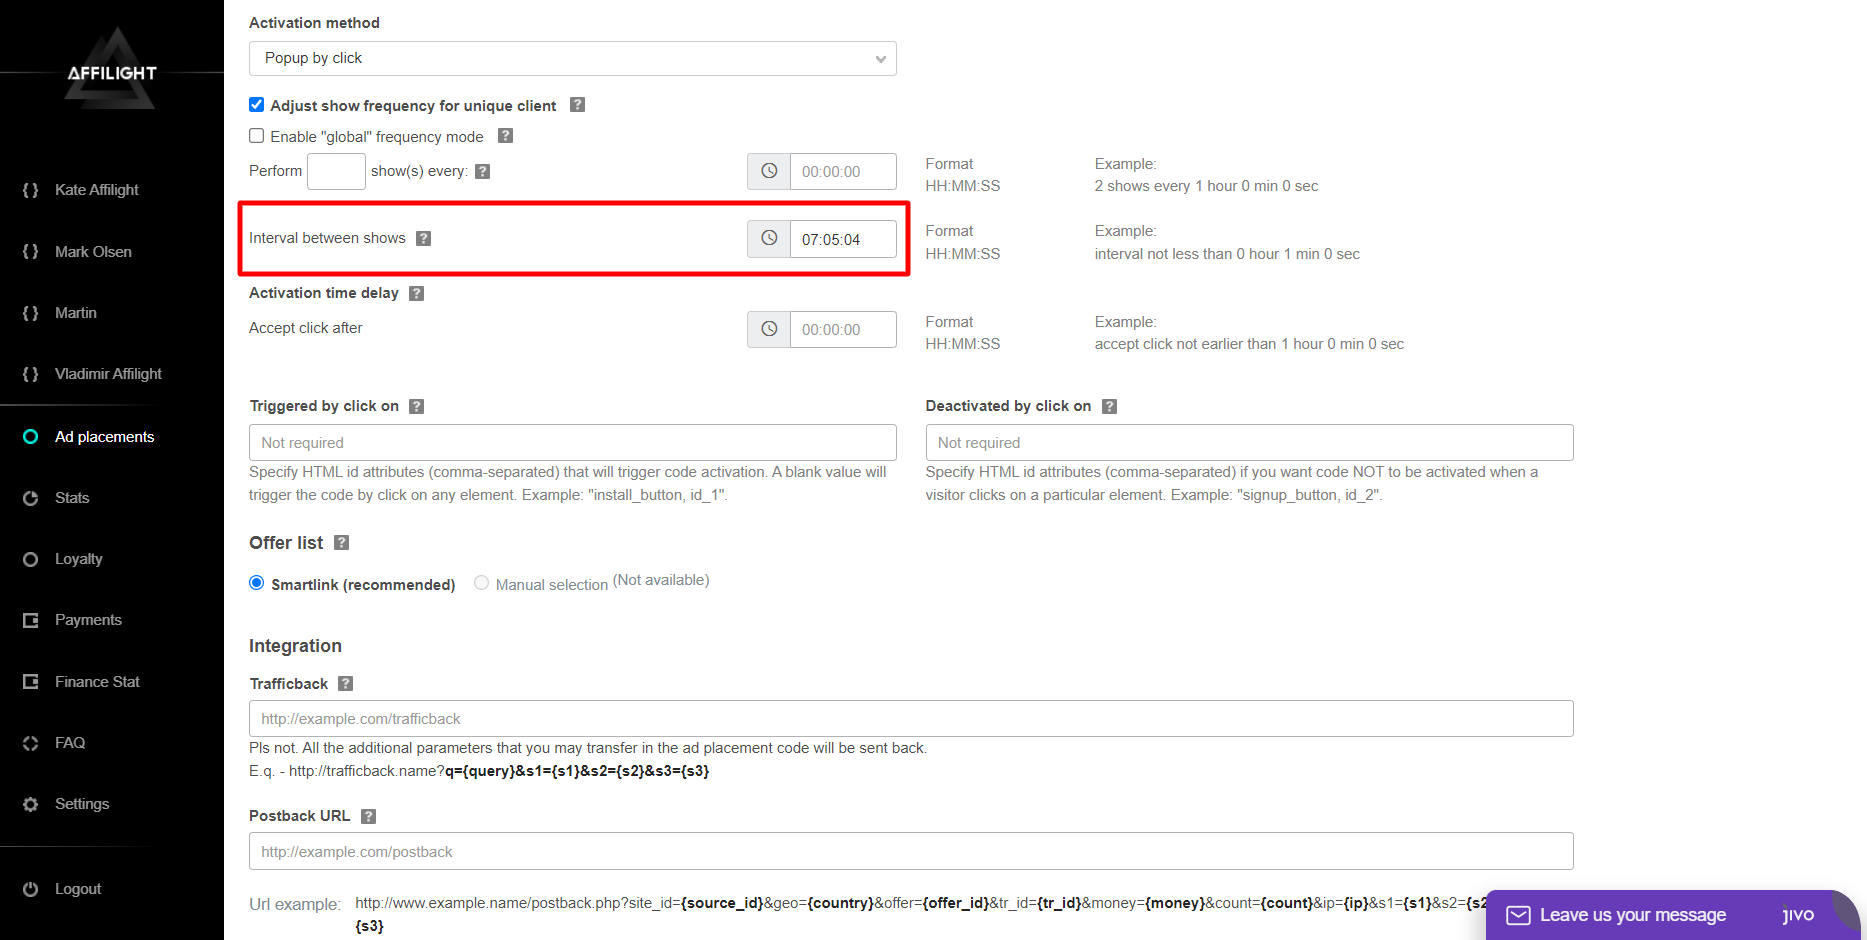
Specify Activation time delay. The code will be activated only if a user spends on a page more than a certain time.
If you specify 30 seconds, the popup will open only after the specified time.
Note: Use this setting carefully. Before you set up Activation time delay, find out the average time on page. If the delay is too long, visitors might leave pages before the script starts to work.

The next field is Triggered by click on. You can specify an element that will trigger code activation. Now a popup will open only when a user clicks on an element with this ID. If you have download site then you can specify an id for a button Download. A blank value will trigger the code by click on any element.
If you want code NOT to be activated when a user clicks on a particular element, specify this element in the field Deactivated by click on. For example, you can create a button Remove Ads.
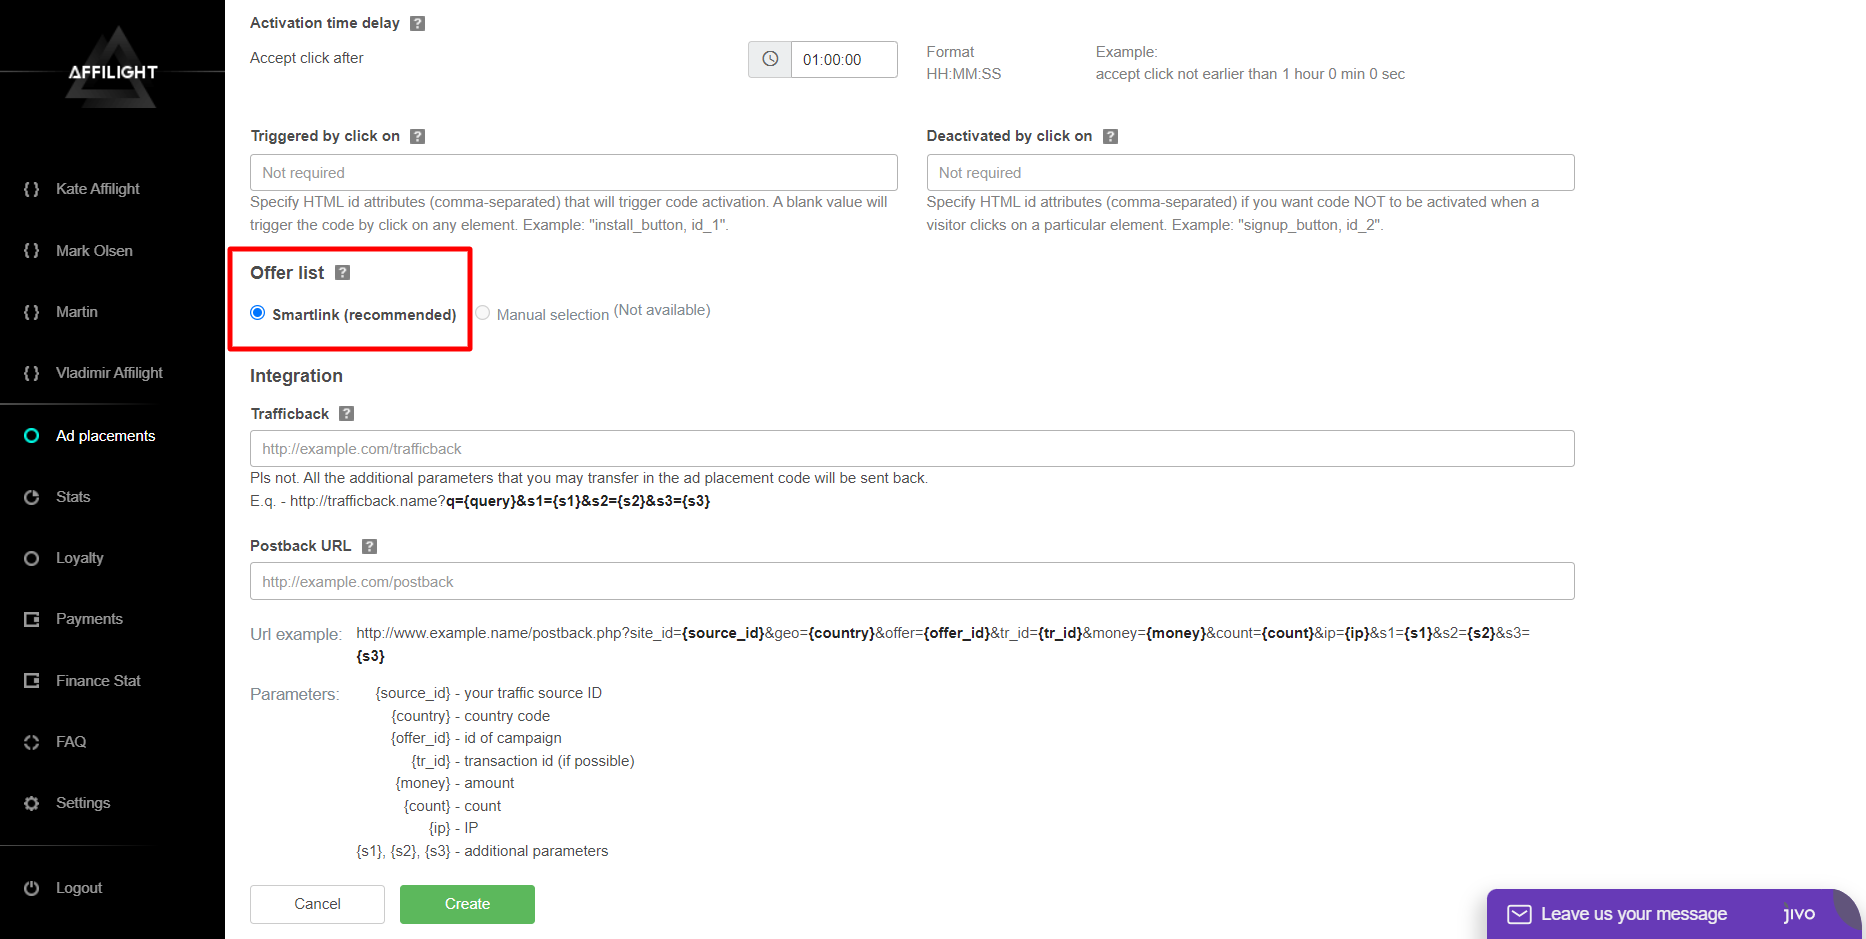
Offer list
Select Smartlink.
It is a link that automatically selects the offers by a number of parameters. This way of monetization is one of the most convenient and easy to use. Particular offers or verticals can be set up (or blocked) by an Affilight manager on your request.
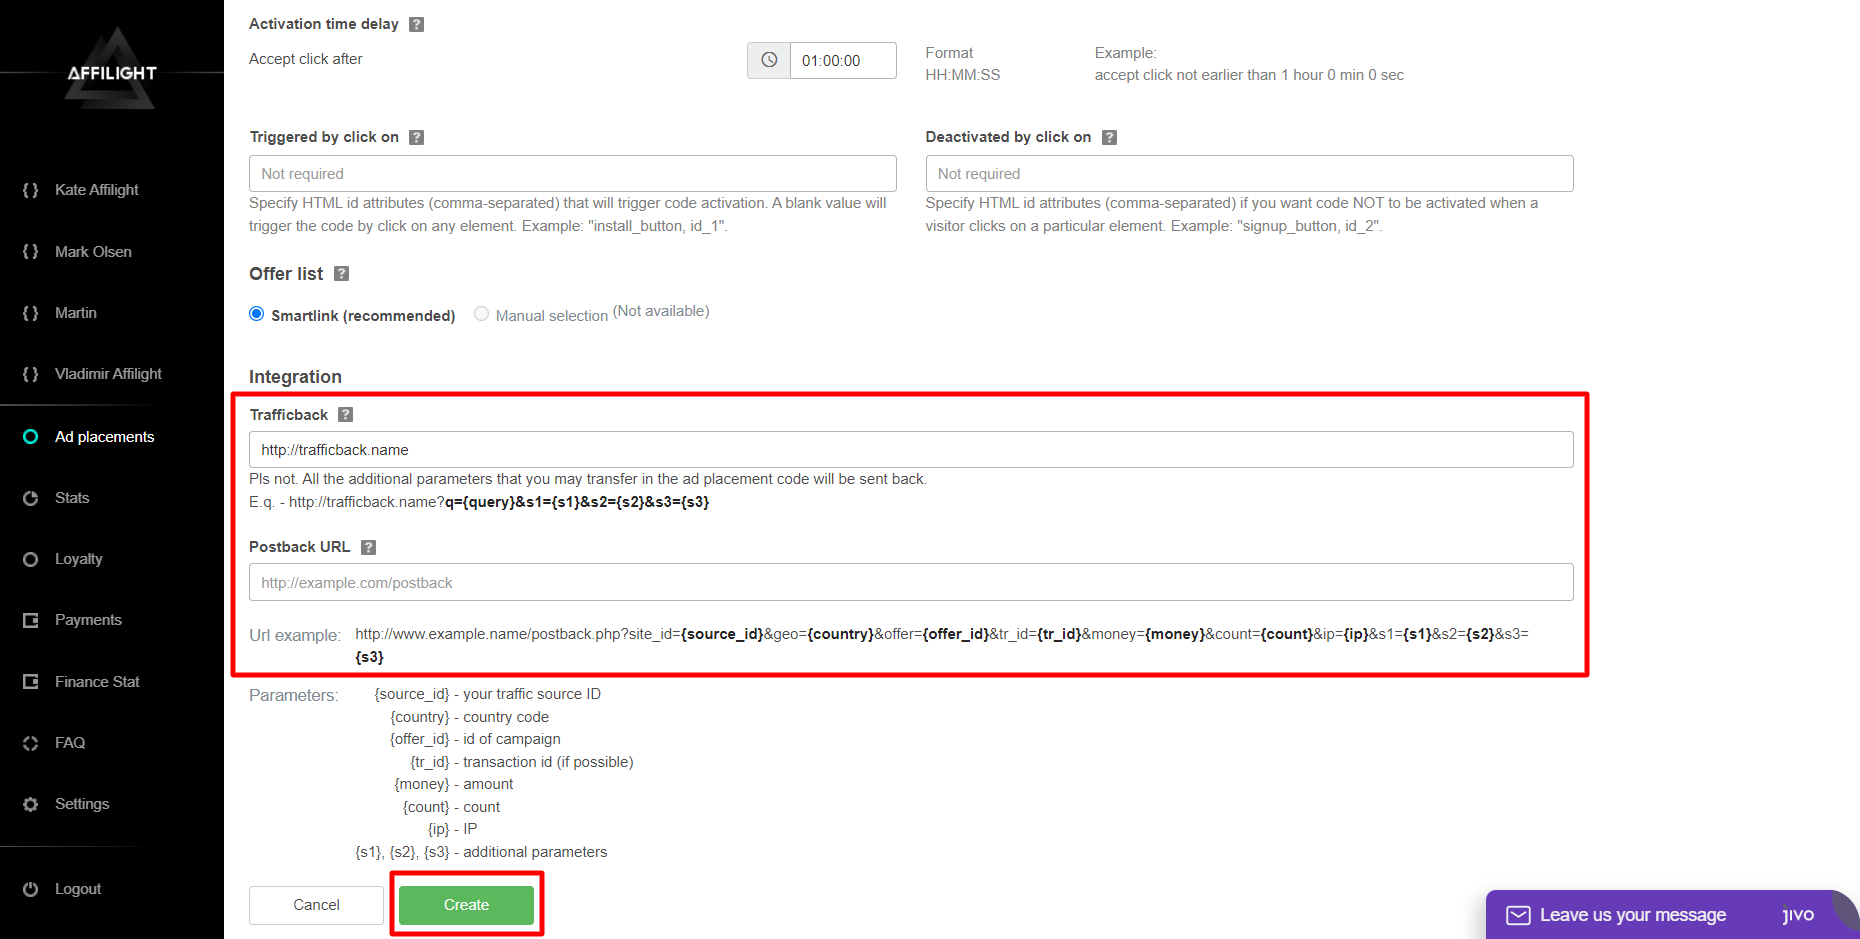
Integration
Trafficback URL is important for traffic and restrictions settings. If we didn’t find ads for a user or we couldn’t accept, for example, desktop traffic then some users see a page 404. If you want to avoid that, specify a page of your website or another ad network as a trafficback. Anytime our system can’t find a suitable ad or a show was blocked, your traffic will be redirected to trafficback and you lose nothing.
Besides, you can add specific parameters in your trafficback. Some networks ask to send them additional information. In our system you can use the following parameters:
- {QUERY} is a keyword. A title of the page is used in the popup script as a keyword by default.
- S1, S2, S3 are additional parameters. How and when use it you can read below.
If you use third-party affiliate tracker then it makes sense to set up Postback. If you need any help, ask our managers to set it up for you. Most publishers don’t need to fill it. You can find a detailed statistic about your traffic in the section Stats.
When all the data is entered, click Create.
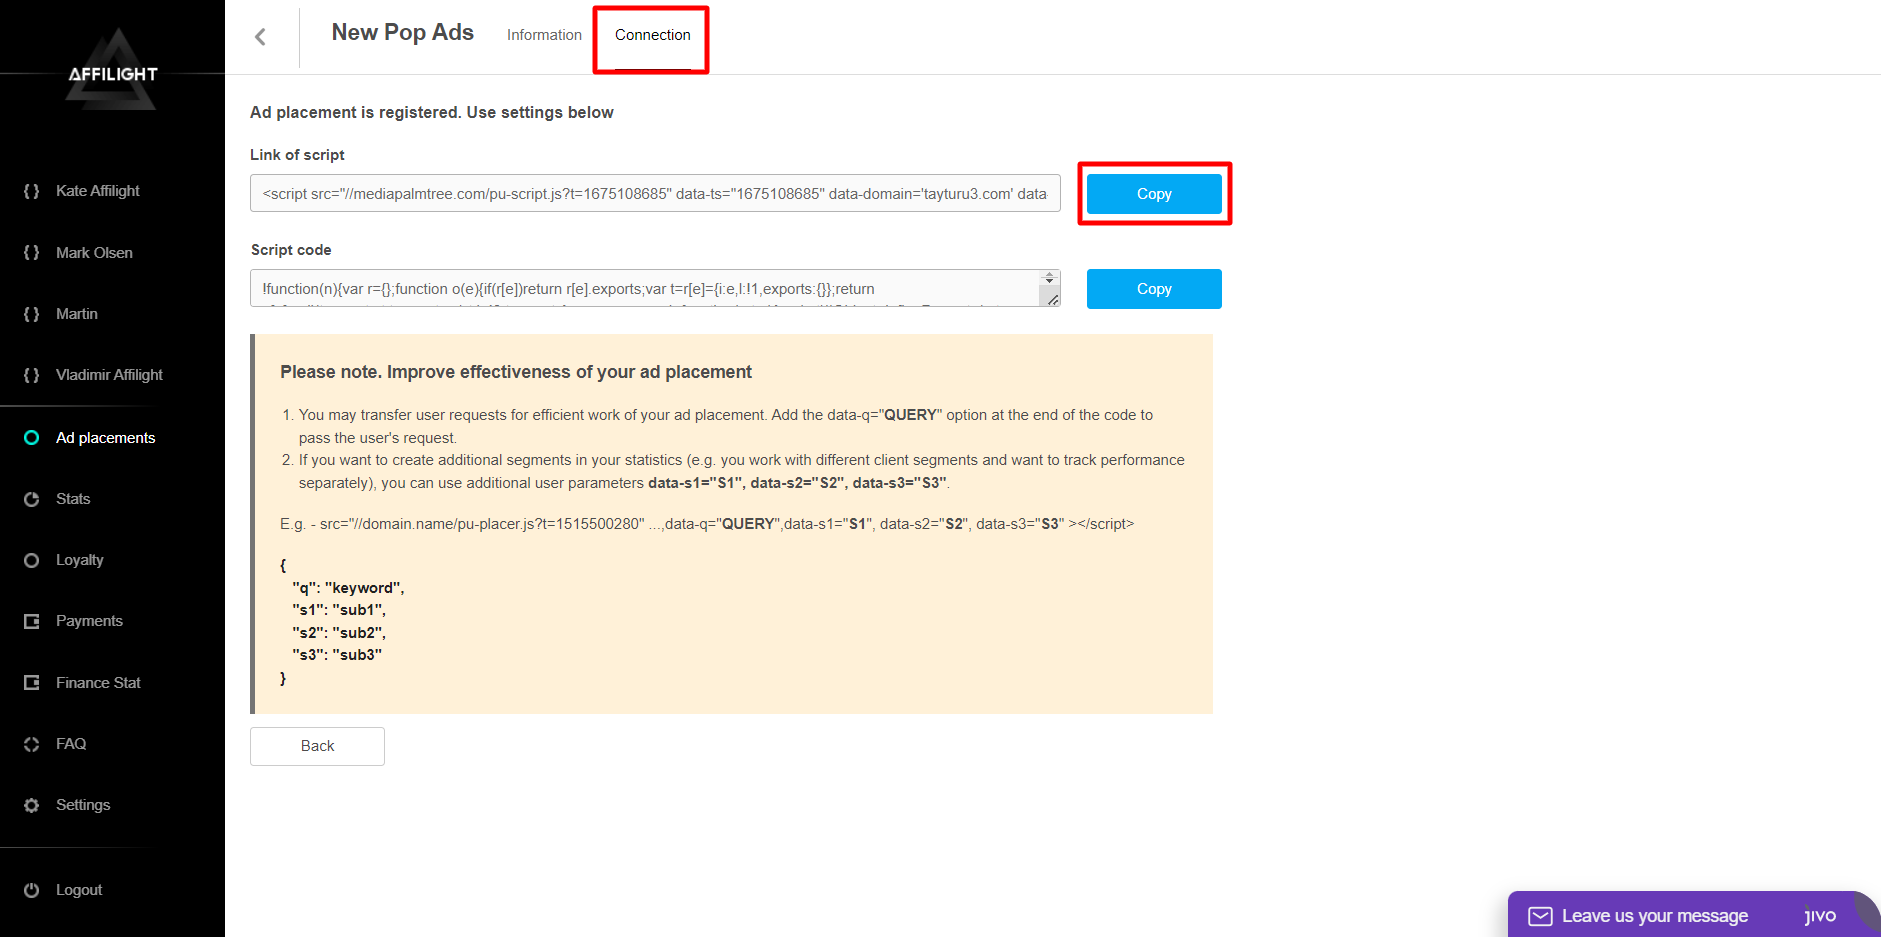
How to Add Onclick Popads Script on Your Website
After the Pop ads script has been created, it must be added to a website. Go to the Connection section and copy the link of the script. The code is used for a “complex” setting.
Note: The functionality of the pop-up script can be extended by the “Fallback” setting. If the ad cannot be opened, Fallback will launch another script. For example, a pop-up script from a third party ad network.
Read about “Fallback” at the end of the article.
Adding script to HTML code
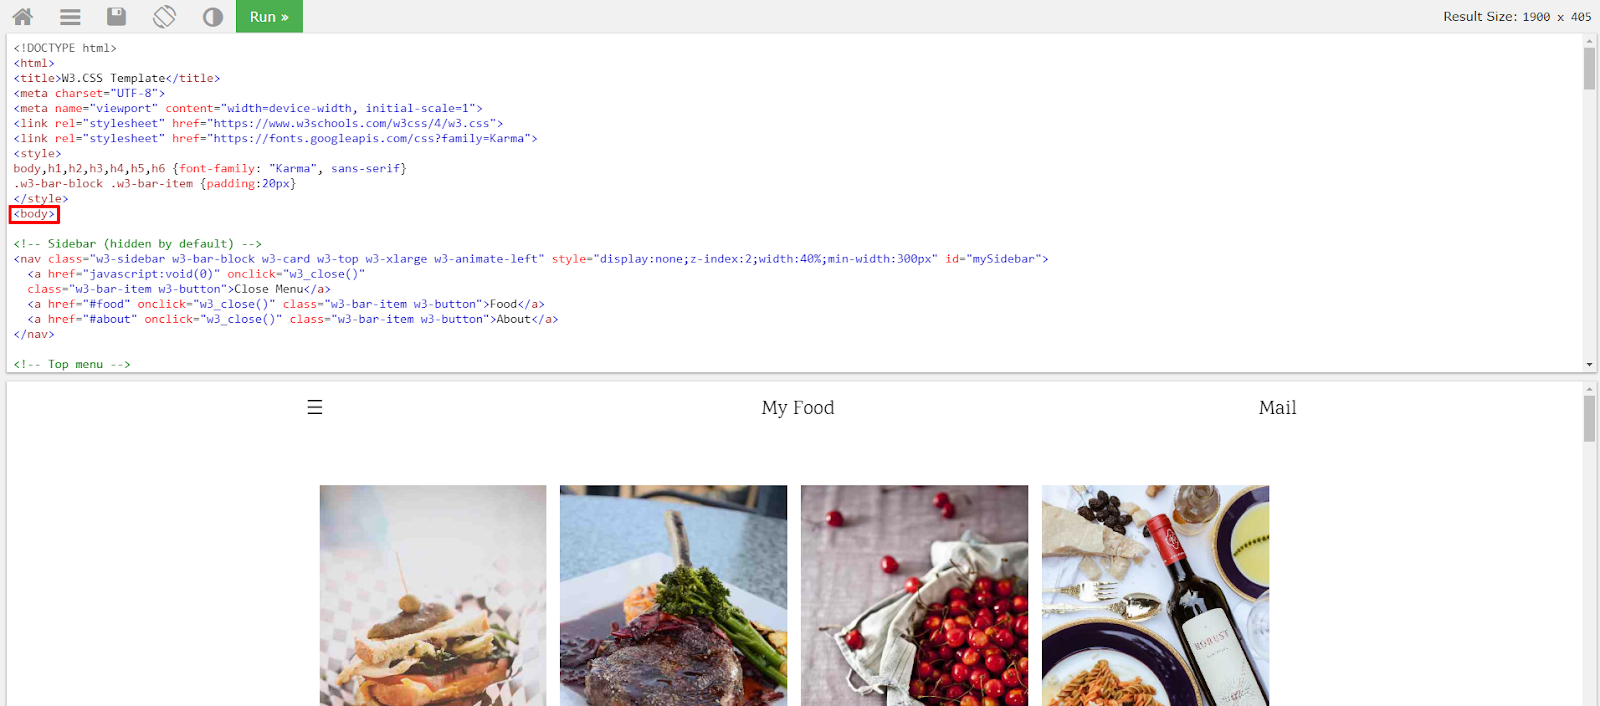
As an example, we will use a text editor and HTML template on w3schools.com. Visit this page and find an opening tag <body>.
Press Enter and insert the code on the next line.
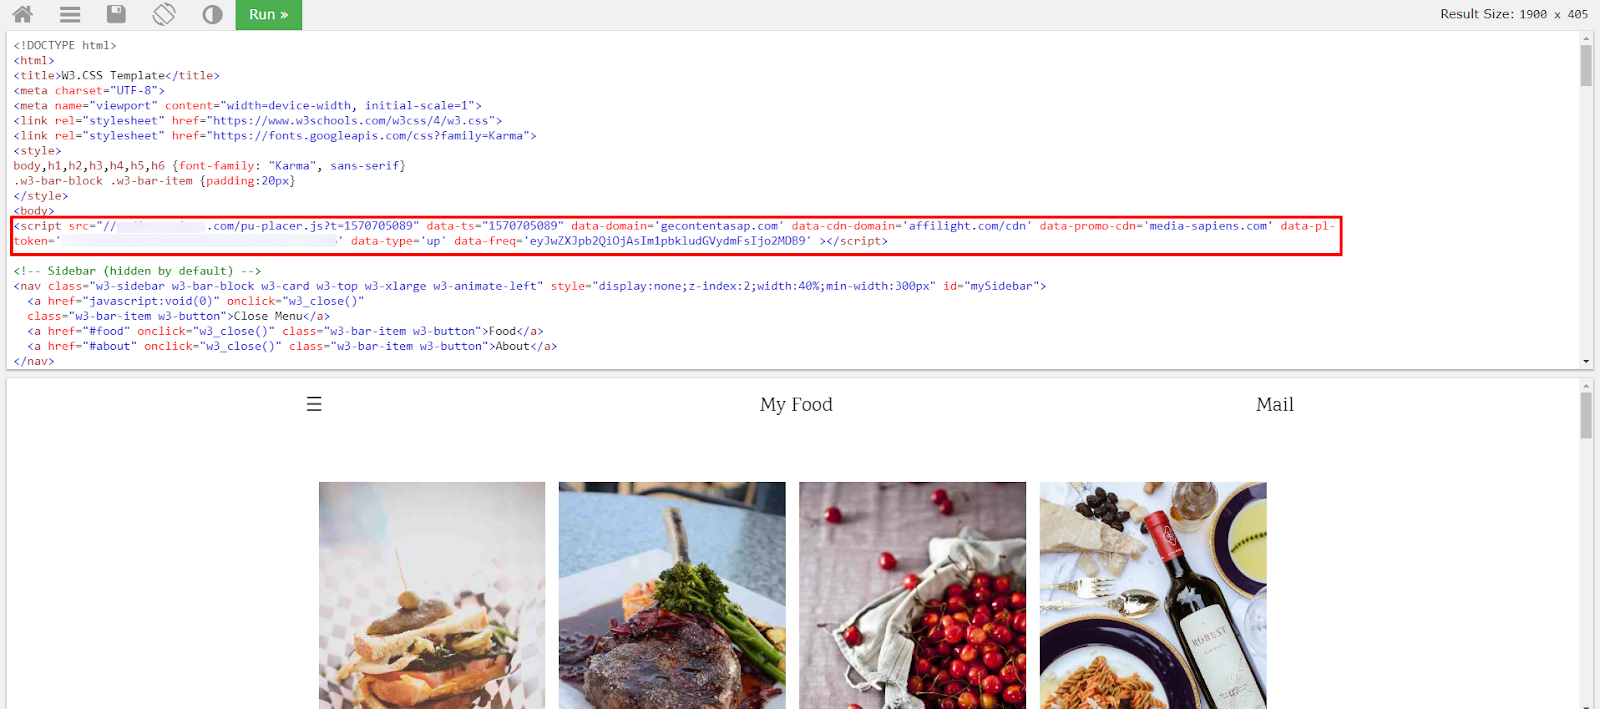
Press the Run button and click on any place on the screen, where the demo page is showed.

Now you can see an advertisement in the new tab.
Note: You can place the link of the script in any place on the page. But we recommend you to put it near the beginning of the code. Add it whether before an ending tag
</head>or right after opening tag<body>.If the platform has just been created, the script may not work on the page. It takes some time to activate a new platform. Wait 10-15 minutes, then check it again.
Adding script via CMS Blogger
To add Onclick Popup to CMS Blogger, you will need to make changes in the installed theme. The process is similar to adding a script to the HTML code.
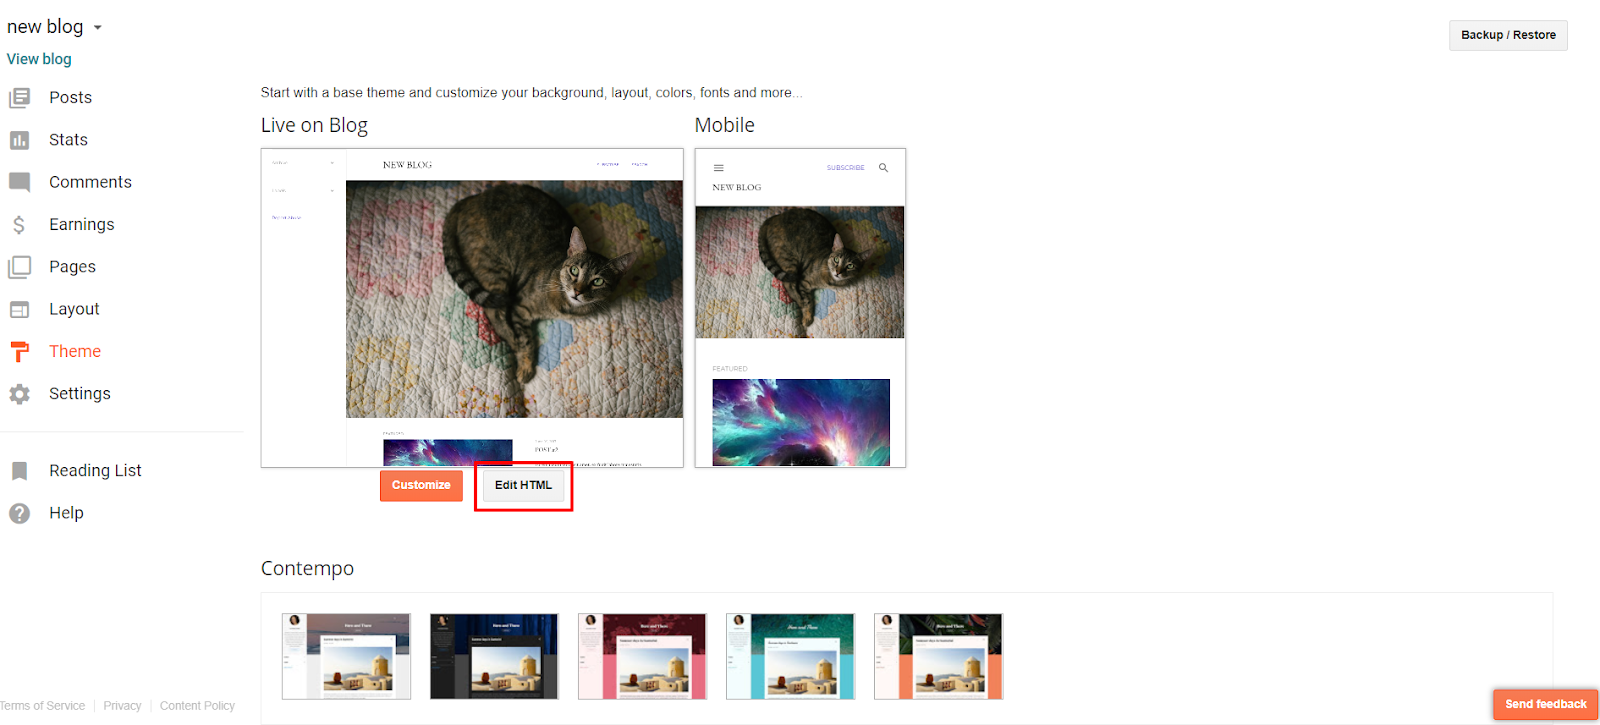
Go to your Blogger account and visit the section Theme.

In the open window click the button Edit HTML.
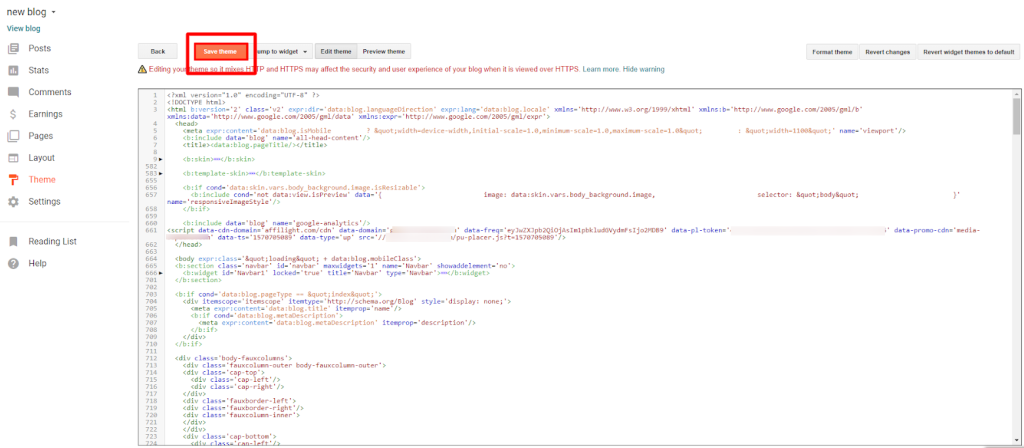
Find an ending tag </head>.
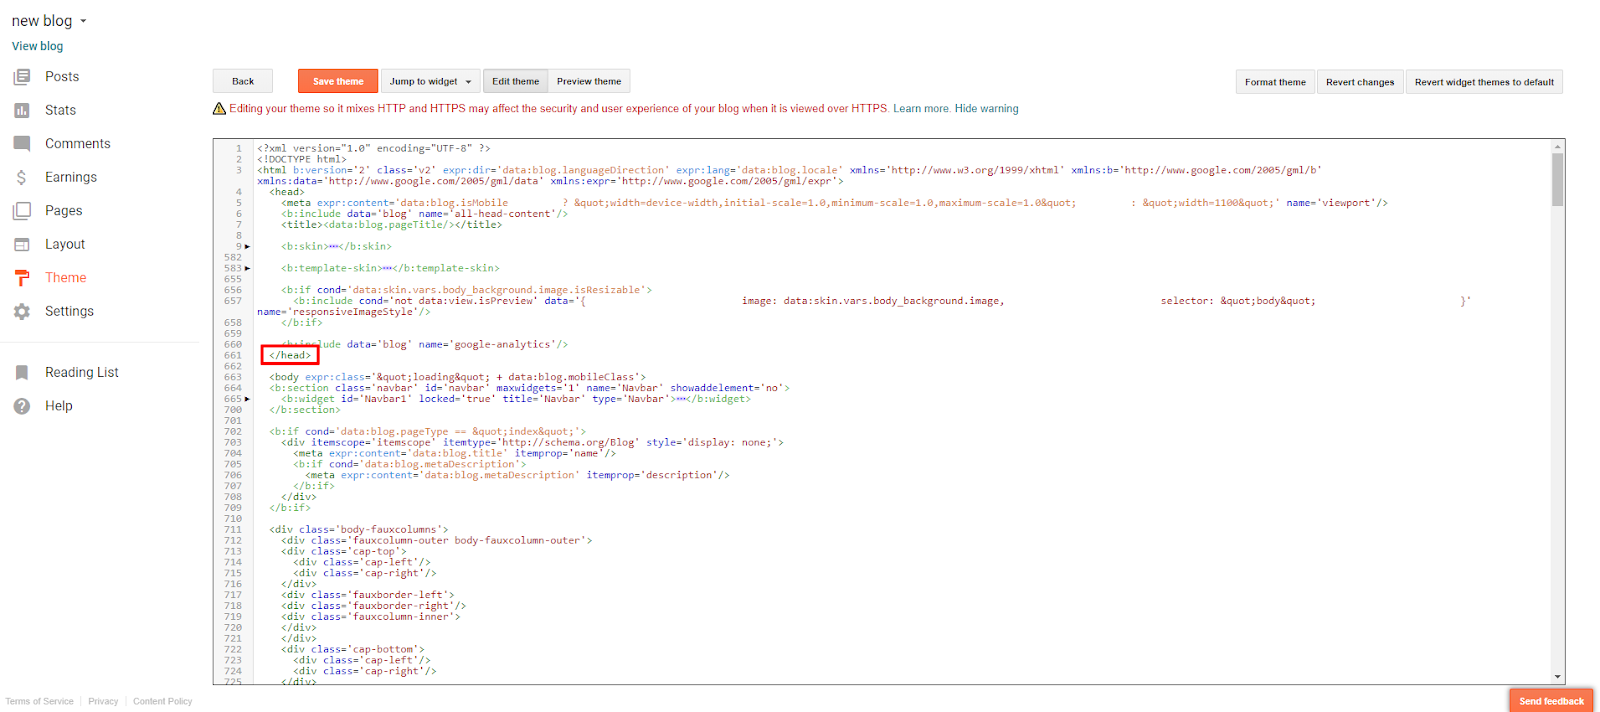
Insert the link of the script in the line before this ending tag </head>.
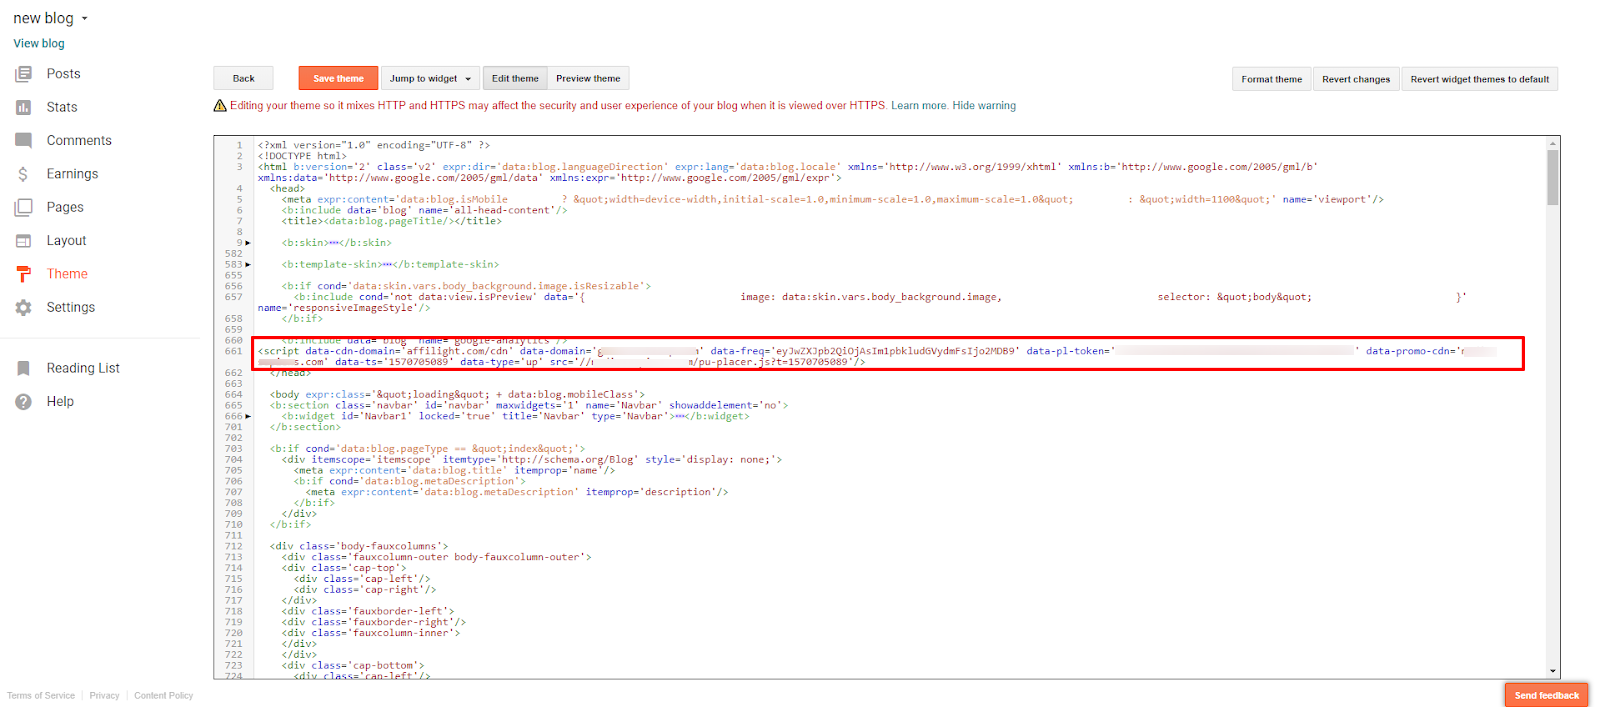
Now click Save theme and the script will become active. Popup will open by click on any place.
Note: If your Blogger theme will be updated or you will switch it to another one, the script will stop working. Don’t forget to add the script again after such changes!
Adding script via CMS WordPress
If you use WordPress CMS, then you can insert the link of the script in two ways: make changes in the theme of your site on WordPress or use a special plugin. The easiest and fastest way is to use the plugin. We will consider it further.
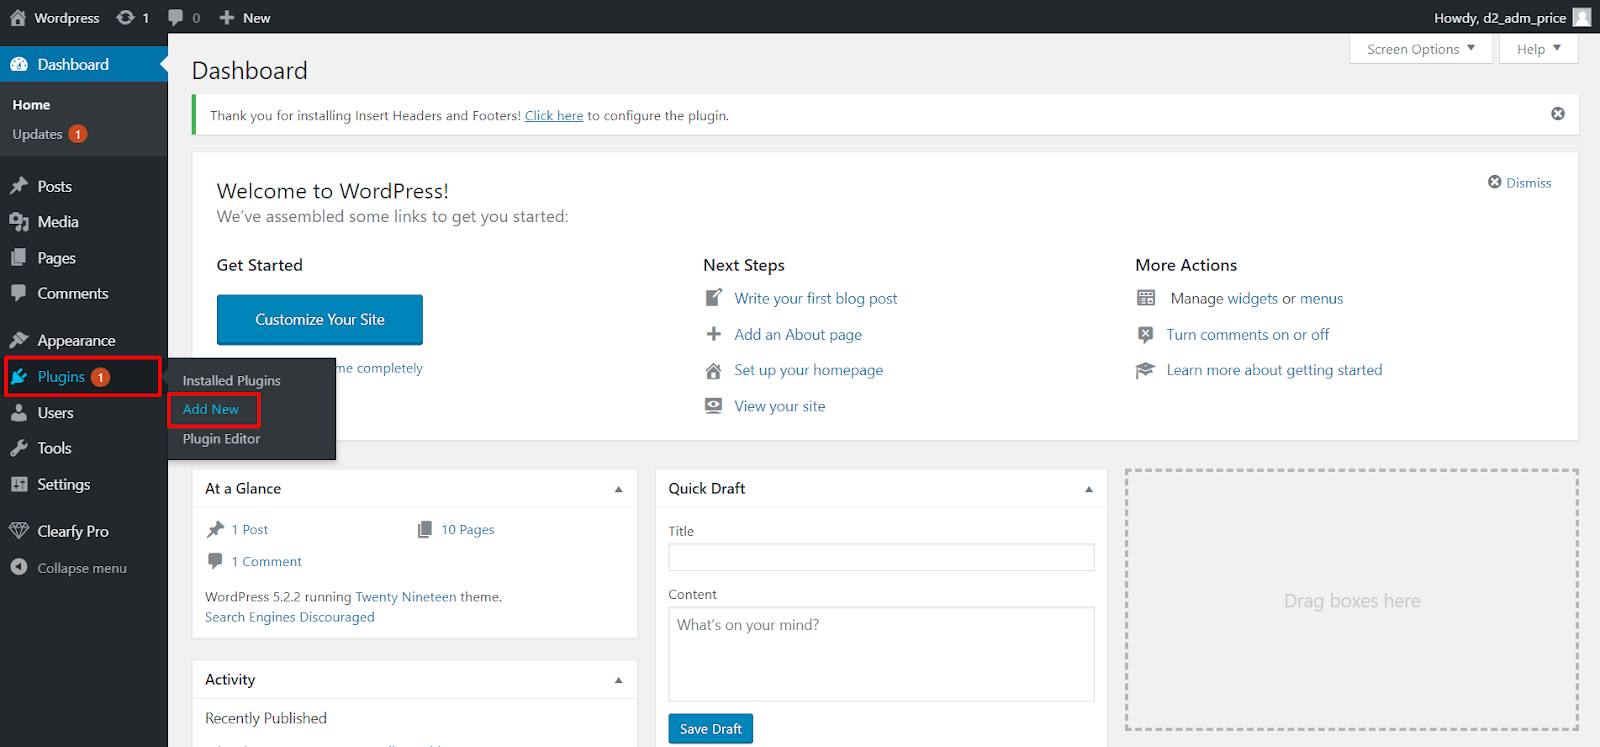
Go to the admin panel of your site on WordPress. Open the Plugins tab and click Add New.
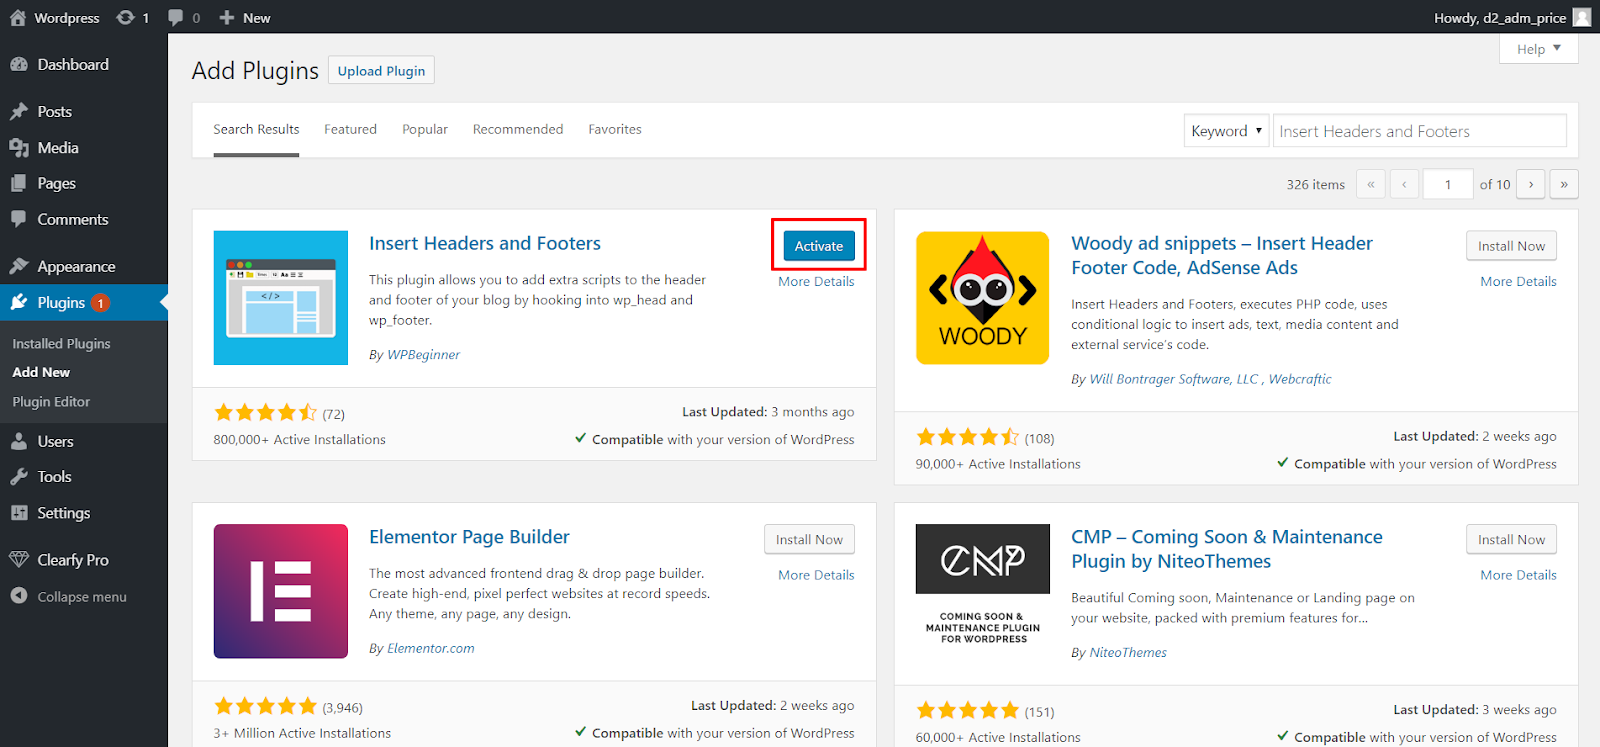
Search for a plugin Insert Headers and Footers and click Install now.

Activate it.
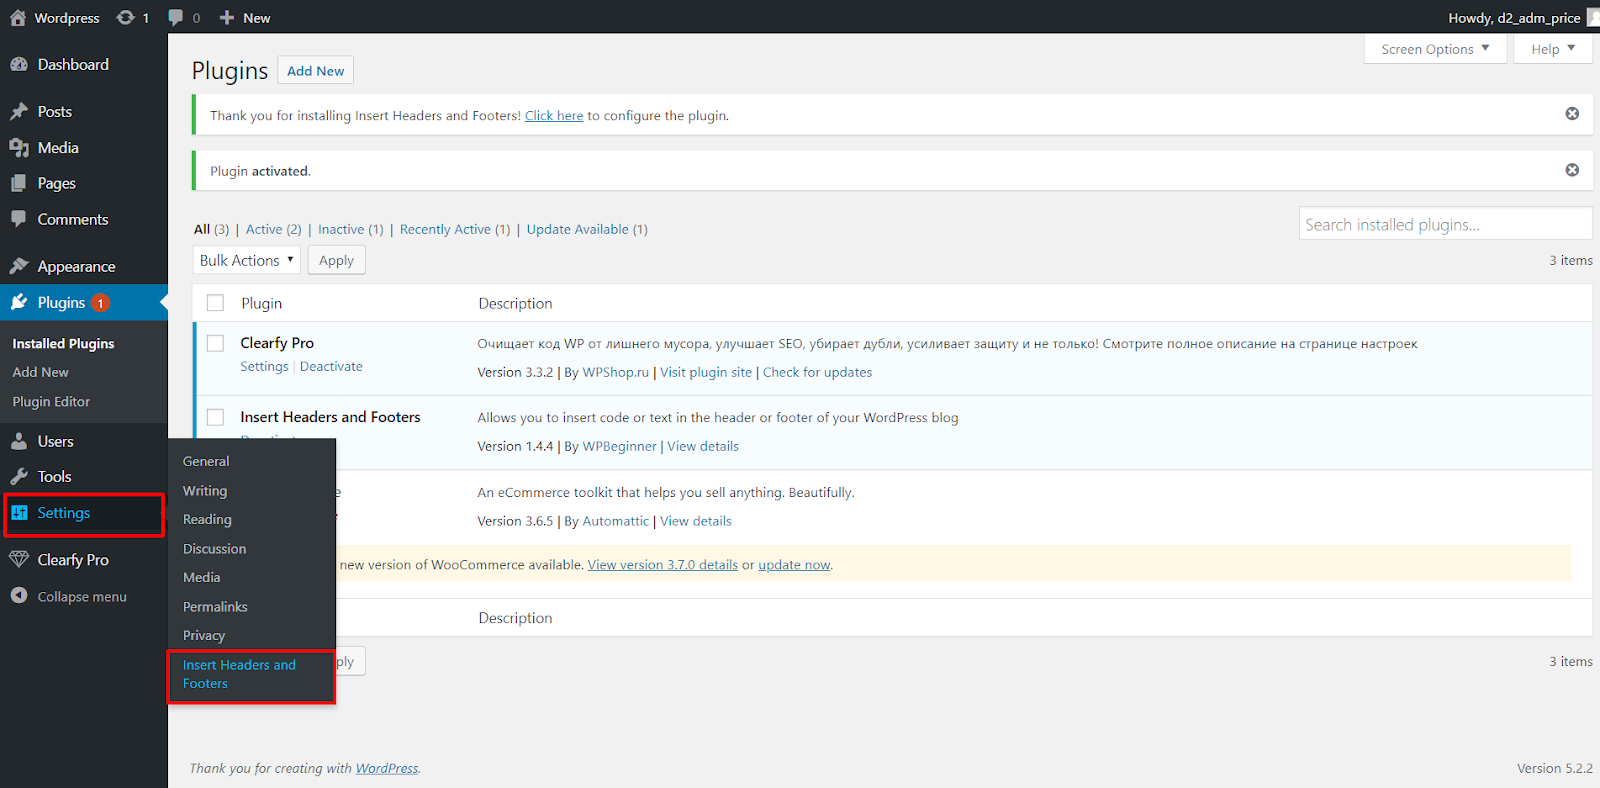
After that, go to Settings / Insert Headers and Footers.
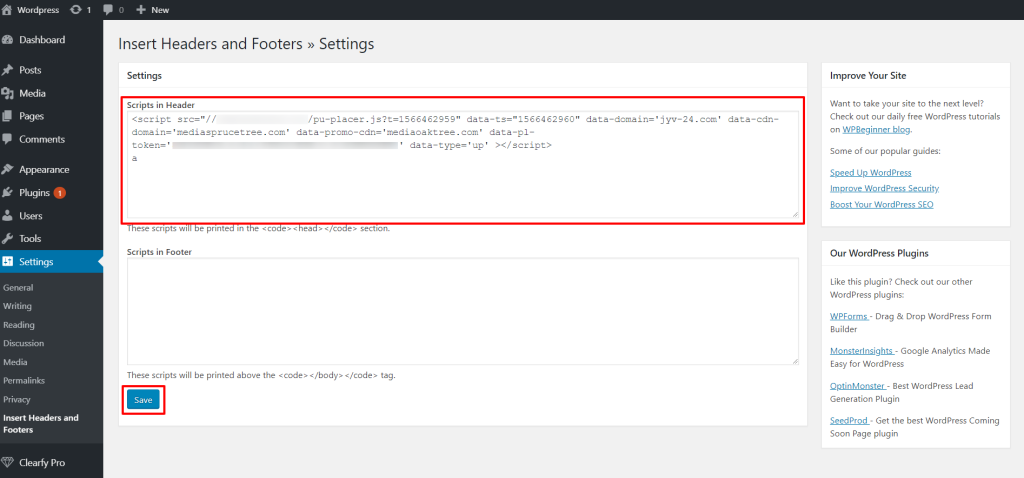
Insert the link of the script in the field Scripts in Header and click Save. Now the script is added.
Note: There are other plugins for ad placement. For example, Ad Inserter — Ad Manager & AdSense Ads. With its help, you can create a list of pages for script integration.
Adding a Fallback Script
Do you want to sell traffic at your own price? In this case, you can set up fallback for the popup script. It will let you connect a backup script of another ad network. It can be useful in some cases such as:
- If we can’t find a suitable ad.
- You want to sell us only a part of traffic, for example, only mobile or desktop. On your request, our manager can set up for you other filters such as GEO/device/browser, etc.
- You want to sell your traffic at a certain price. If traffic costs less than you want, it will be redirected in a fallback script. This setting is accessible via managers.
The first way of script integration
A standard link to the popup script is as follows:
<script src="//example.com/pu-placer.js?t=1570707368" data-ts="1570707368" data-domain='gecontentasap.com' data-cdn-domain='affilight.com/cdn' data-promo-cdn='example.com' data-pl-token='347679a44256bfe19011b8e113f6ae0f372555a6' data-type='up' data-freq='eyJwZXJpb2QiOjAsIm1pbkludGVydmFsIjo2MDB9' ></script> You need to add the next value:
data-fallback-src="SRC_TO_SCRIPT"SRC_TO_SCRIPT should be changed to the link of the script for Fallback. For this test, we will use a link that alerts if there are no appropriate ads. The address of this link:
https://affilight.com/blog/wp-content/uploads/demo/fallback_test_demo.js Now let’s add script on our link on popup:
data-fallback-src="https://affilight.com/blog/wp-content/uploads/demo/fallback_test_demo.js"As a result, we will get this code:
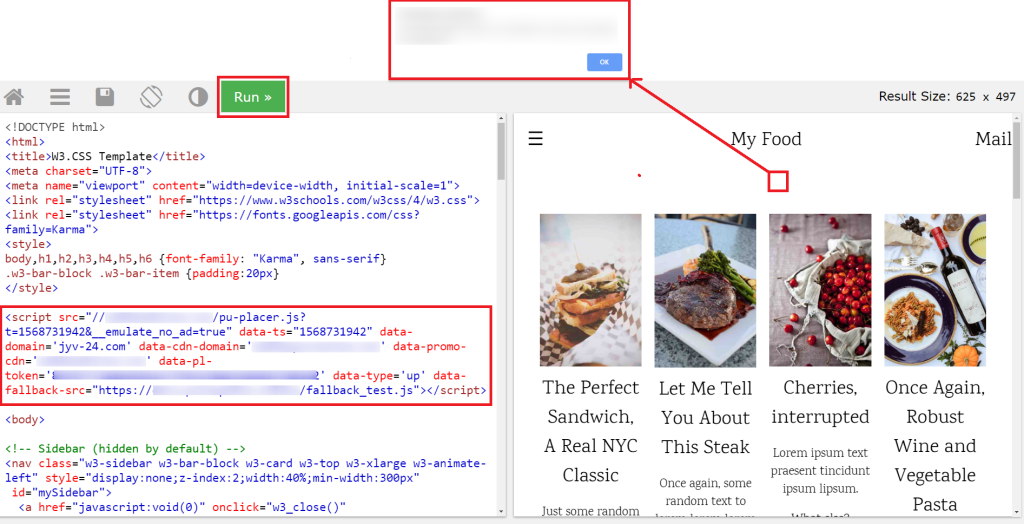
<script src="//example.com/pu-placer.js?t=1570707368" data-ts="1570707368" data-domain='gecontentasap.com' data-cdn-domain='affilight.com/cdn' data-promo-cdn='example.com' data-pl-token='347679a44256bfe19011b8e113f6ae0f372555a6' data-type='up' data-freq='eyJwZXJpb2QiOjAsIm1pbkludGVydmFsIjo2MDB9' data-fallback-src="https://affilight.com/blog/wp-content/uploads/demo/fallback_test_demo.js"></script> As an example, we will use a text editor on W3Schools. Follow this link and add the script with Fallback after ending tag </style>.
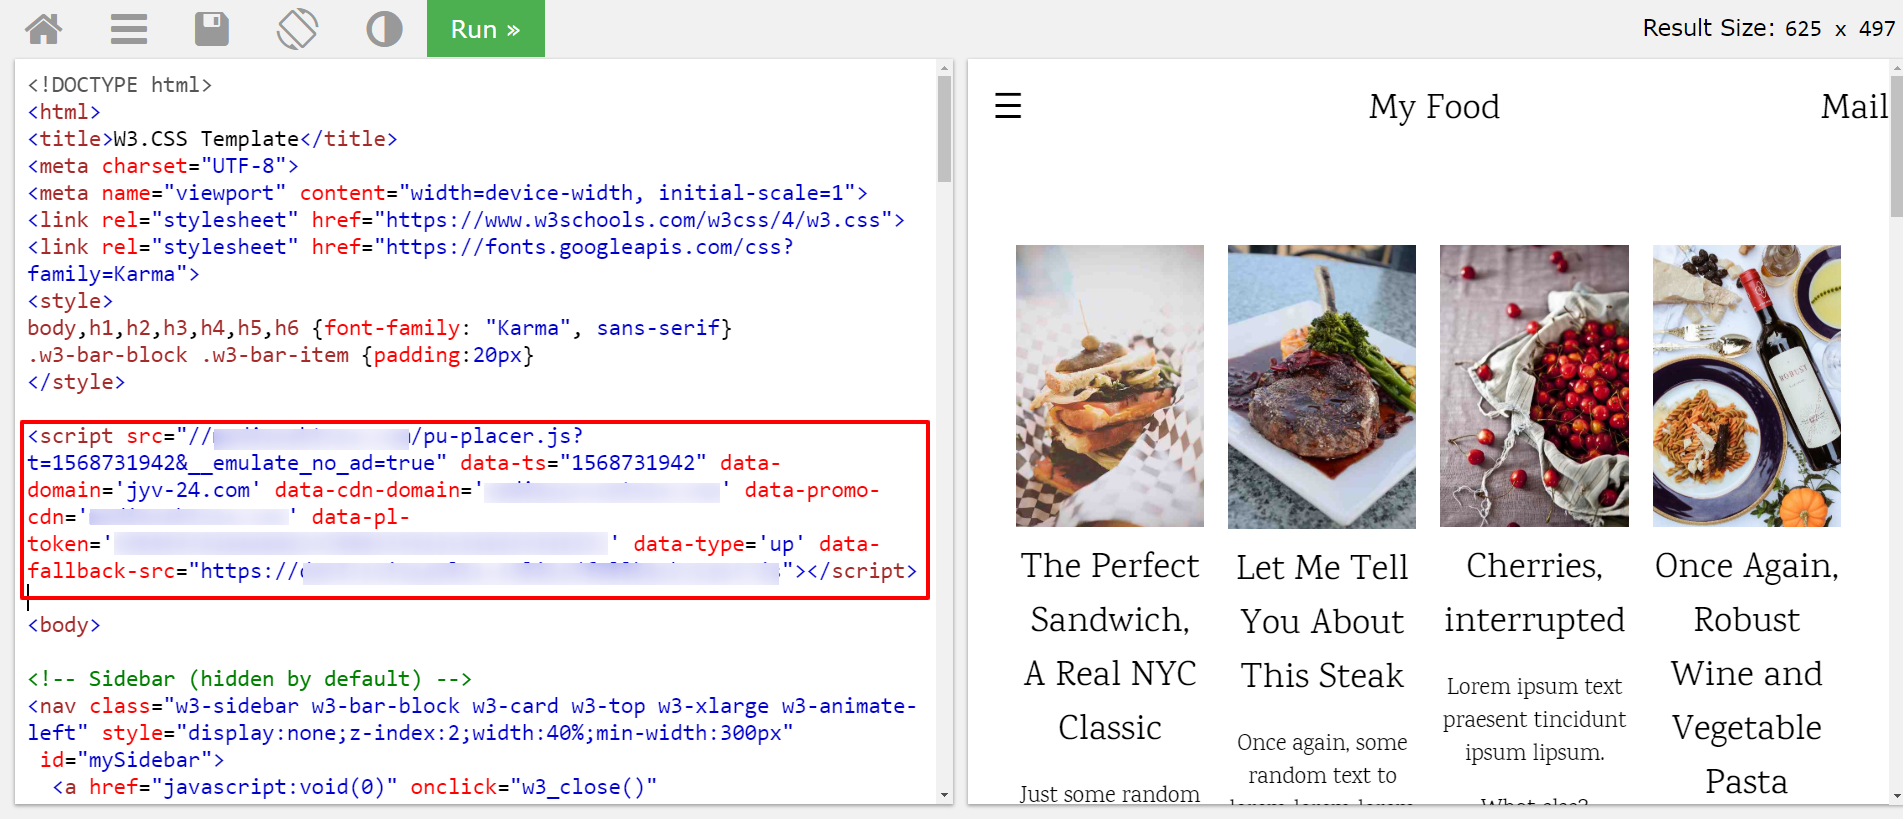
Click the button Run and click on any place on the website.
If our system finds a suitable ad for you, it will be open in a new tab.
If you want to imitate the situation when a suitable ad can’t be found, add the element to the site URL:
&__emulate_no_ad=trueYou will get a link:
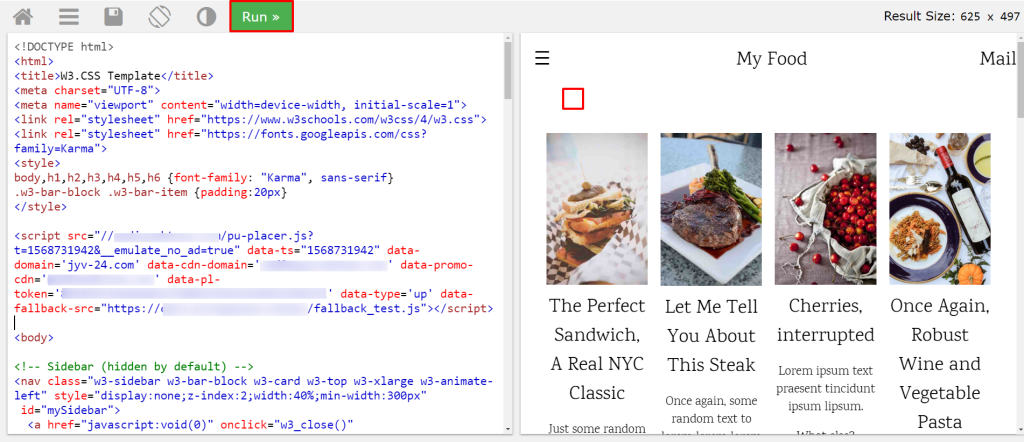
https://www.w3schools.com/w3css/tryit.asp?filename=tryw3css_templates_food_blog&stacked=h&__emulate_no_ad=trueWhen you visit the new link the previous script will be removed from the page. You need to add it again after ending tag </style> and press the Run button.
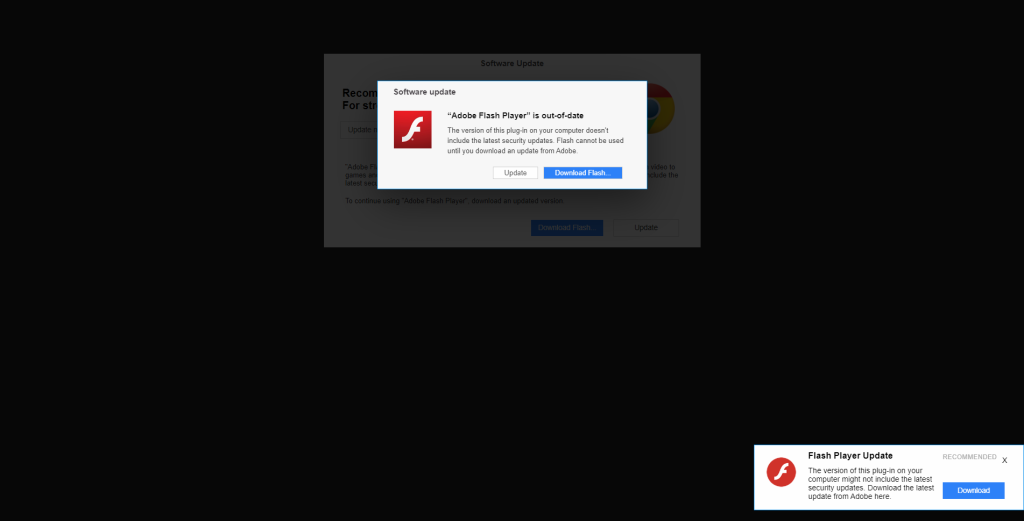
When you click on any place on the page there will appear a message.
The second way of script integration
We will use the same algorithm but the script have been changed.
The first part of the code is a link on popup script, without any changes. It will be as follows:
<script src="//example.com/pu-placer.js?t=1570707368" data-ts="1570707368" data-domain='gecontentasap.com' data-cdn-domain='affilight.com/cdn' data-promo-cdn='example.com' data-pl-token='347679a44256bfe19011b8e113f6ae0f372555a6' data-type='up' data-freq='eyJwZXJpb2QiOjAsIm1pbkludGVydmFsIjo2MDB9' ></script> After the link on the script, you need to set up a container, where a script of another advertising network will be placed:
 <script>    window.onnoads_PLACE YOUR TOKEN FROM THE CODE HERE = function () {
      // PLACE YOUR CODE HERE
    }
  </script>
In our case we will use test script and add it instead of “// PLACE YOUR CODE HERE”. The script will display a message stating that system didn’t find a suitable ad for your website.
 document.onclick = myClickHandler;        function myClickHandler() {
            alert("This is an example of a Fallback script. If you see this message, it means that our system didn’t find a suitable ad for your website during debug process. In real life, the script of another ad network will be triggered.");
        }
Combine all the scripts above and we will get the following code:
<script src="//example.com/pu-placer.js?t=1570707368" data-ts="1570707368" data-domain='gecontentasap.com' data-cdn-domain='affilight.com/cdn' data-promo-cdn='example.com' data-pl-token='347679a44256bfe19011b8e113f6ae0f372555a6' data-type='up' data-freq='eyJwZXJpb2QiOjAsIm1pbkludGVydmFsIjo2MDB9' ></script><script>
window.onnoads_427679a44256bfe19011b8e113f6ae0f372555a6 = function () {
document.onclick = myClickHandler;
function myClickHandler() {
alert("This is an example of a Fallback script. If you see this message, it means that our system didn’t find a suitable ad for your website during debug process. In real life, the script of another ad network will be triggered.");
}
}
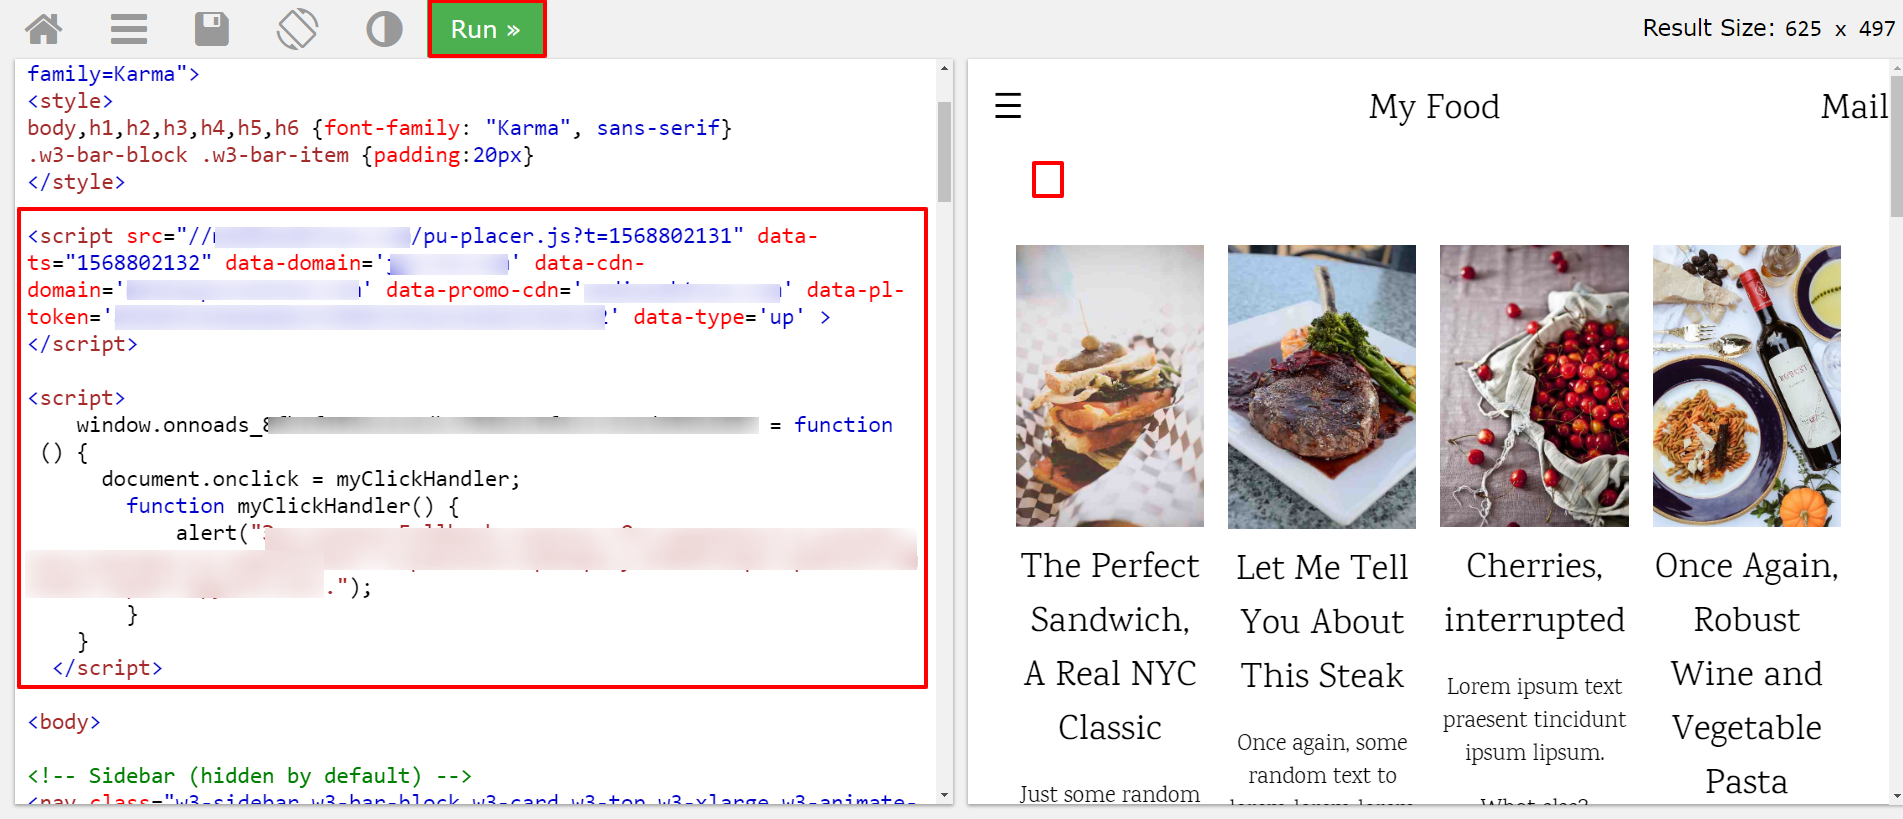
</script> Visit the test website and insert the code.
Press the Run button and click on any place.
If our system finds a suitable offer, it will open in a new tab.
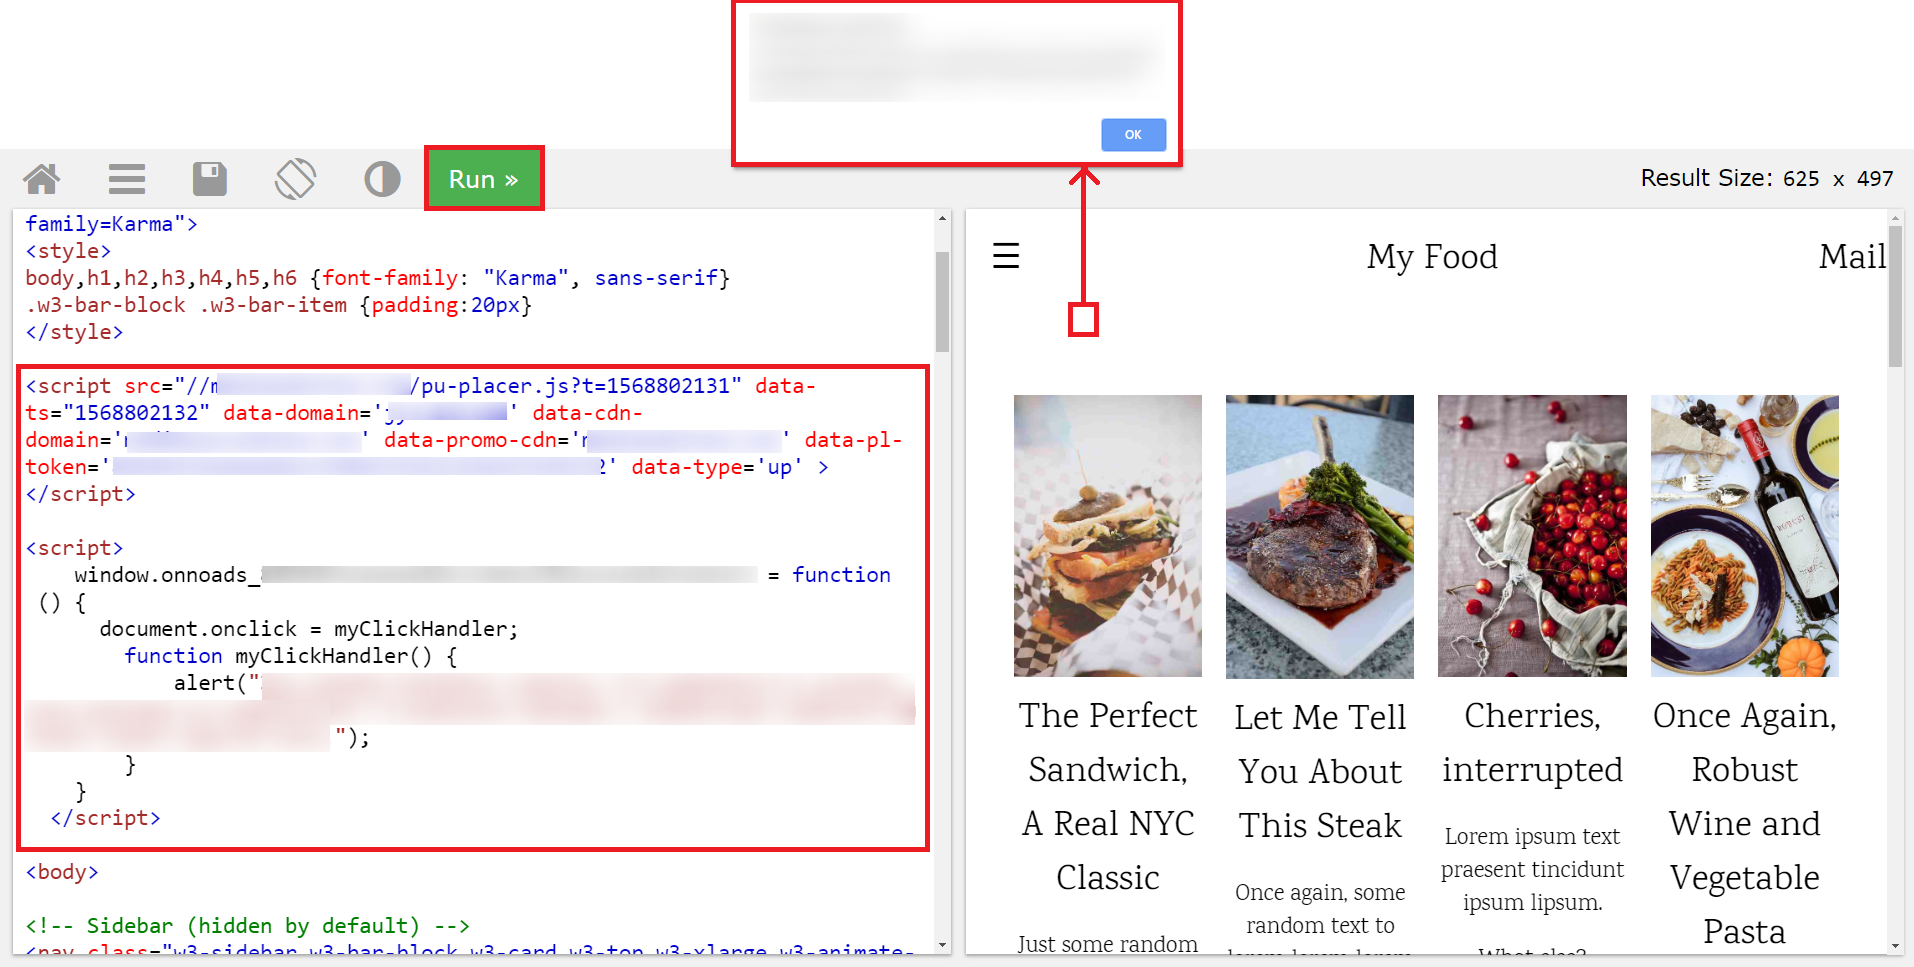
If you want to imitate the situation when a suitable ad can’t be found, follow this link. At the end of this link, there is a special parameter. It emulates the situation when we couldn’t find a suitable ad or a show was blocked.
When you visit the new link the previous script will be removed from the page. Add it again after ending tag </style> and press the Run button. When you click on any place on the page there will appear a message.
Final Notes
- Fill in sections such as Settings of ad placement, Ad inventory, Offer list, and Integration is obligatory.
- When you set up pop ads pay special attention to Trafficback.
- Copy and paste on your website a link of the script that you received.
- If you want to test a script you can use a special website.
- Our fallback script lets you connect a backup script of another ad network. Even if we can’t find a suitable ad, you lose nothing.
- You can set up a minimum bid for your traffic. Please, contact our managers to do this.
That’s all! Now you know how to create and integrate pop ads.